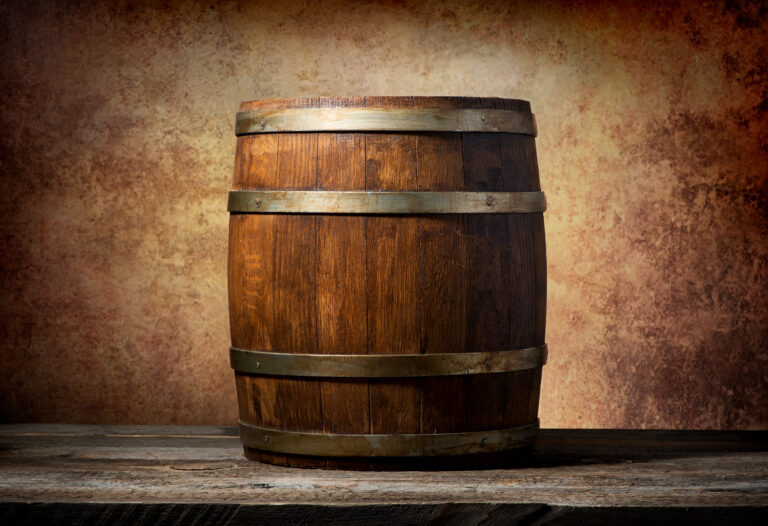
Ever felt that urge to build your own whiskey barrel shelf but immediately got overwhelmed just thinking about it? Stop right there! You absolutely got this. Putting together a fantastic rustic whiskey barrel shelf that has the same charm as other wall shelves is actually a super simple DIY project that you can easily knock out over a weekend. All you need is a genuine used whiskey barrel, a few basic tools, some solid wood boards, and the willingness to get your hands a little dirty. Trust me, you’ll be kicking back with your favorite drink next to your awesome new shelf in no time, proud of your custom wall decor style piece.
Gather Your Materials: Wood, Screws, Etc.
To successfully install a shelf inside a whiskey barrel, you need to gather a handful of simple supplies.
Wood boards
You’ll need a few wooden boards for the wood shelf surface itself. Cedar, redwood, or cypress are excellent choices because they naturally handle moisture well and work beautifully as reclaimed wood for rustic projects. A 1×10 board should work for most barrels, but it’s crucial to measure your barrel first to be sure.
Heavy-duty screws
For securing the boards, grab some heavy duty wood screws that are at least 2 to 3 inches long. These act as your basic mounting hardware. Stainless steel screws are ideal because they resist corrosion. You need screws that can securely grip the curved wood of the barrel staves.
Wood glue (optional)
Applying a bit of wood glue to the top edge of the barrel before attaching the boards will create an even stronger, more robust bond, but you can skip it if you prefer.
Sandpaper (optional)
Giving the areas where the boards will sit a light sanding might help them grip the barrel wood better. Just make sure to wipe away all the dust before you start installation.
Saw (optional)
If your chosen boards are too long, you’ll need a saw to cut them to size. A handsaw, circular saw, or jigsaw will all work just fine.
With the right materials gathered, you are fully ready to install your whiskey barrel shelf. That little bit of effort will be totally worth it when you can proudly display your favorite bottles on this cool, rustic DIY shelf that pairs nicely with other decorative shelves in your home.
Measure and Cut the Wood for the Shelf
To put a perfect shelf in your whiskey barrel, let’s make sure you have the basics:
- A wooden board for the shelf surface (pine, oak, or cedar 1×10 boards are great solid hardwood choices).
- Four reliable brackets to attach the shelf to the barrel staves. Look for brackets designed to grip rounded edges, similar to compact steel brackets used for floating shelving.
- Wood screws that are at least 1 1/2 to 2 inches long to secure those brackets.
First, measure the inside diameter of your barrel exactly at the height where you want the shelf. Cut your board to size so it is just slightly smaller than the barrel’s width, this allows for an easy fit.
Next, measure and mark where the brackets will attach to both the board and the barrel staves. You should position the brackets a few inches in from each edge of the board. Hold each bracket up to your marks and use a level to ensure they are even before you screw them into place.
Once the brackets are secured to both the board and the barrel, you can simply set your new shelf into its spot! Now you’ve got easy, stylish storage for your whiskey glasses, decanters, and other bar essentials.
Sand and Stain the Shelf to Match the Barrel
Now that you have your barrel secured and the shelf perfectly cut to size, it’s time to match the look! This step will help your new shelf blend seamlessly with the rustic barrel.
Sanding the Shelf
Use fine-grit sandpaper (around 220 grit) to lightly sand the shelf surface. Wipe away all the dust with a tack cloth. This little bit of work will help the stain soak into the wood better.
Staining the Shelf
Apply 2-3 coats of wood stain to the shelf, letting it dry completely as directed between coats. An oil-based stain in a medium brown color is usually best for matching a genuine whiskey barrel. Use a stain brush to coat the entire shelf, then wipe off any excess with a rag after just a few minutes.
Let the final coat dry fully, then you’re ready to install! The stain and sealant protect the wood, providing a durable finish so you can enjoy your barrel shelf for years to come. This rustic DIY project is a timeless addition to your wall decor and home bar setup.
Determine Shelf Placement Inside the Barrel
With the barrel secured, it’s time to pick the perfect spot for your shelf inside. To make the most of the space, choose a height that allows you to store a variety of bottle shapes and sizes.
A great idea is to install the shelf at about a third of the way up from the bottom. This position is fantastic because it allows you to store taller bottles below the shelf while giving you surface area on top for smaller bottles, glasses, or bar tools. You’ll be able to keep a good amount of your whiskey collection on display.
When installing, make sure the shelf is perfectly level for both appearance and functionality. Use a level to check that it’s even from front to back and side to side before securing it. For an easy install, you can use strong barrel brackets to attach a wooden board. If you need a more heavy duty shelf, you can bolt metal brackets to the inside of the barrel to support extra weight.
Once that shelf is in place, you’ve basically created a custom whiskey barrel bar! Add your favorite bottles, glasses, and bar accessories to finish the look. Your friends are going to be seriously impressed with your crafty creation.
Drill Pilot Holes Into the Barrel Staves
To attach the shelf boards securely to the barrel staves, you absolutely need to drill pilot holes first. Pilot holes are essential, they allow the screws to grip the wood more effectively and prevent the thick wood from cracking.
Using a drill bit that is slightly smaller than your screw diameter, slowly drill pilot holes into the barrel staves exactly where you’ve marked your shelf placement. Take your time to avoid slipping! Wipe away any wood shavings when you’re done so they do not interfere with the mounting parts.
These pilot holes are critical for securing the shelf boards without damaging your precious barrel. Be precise and patient when drilling to ensure you get a super strong shelf installation, the same way you would when preparing boards and supports for a heavy wood shelf on a wall.
Insert Screws Partway Into the Pilot Holes
Now it’s time to start securing the shelf. You need to do this slowly and carefully, checking that the shelf stays perfectly level as you go.
Take two screws and start threading them into the pilot holes you drilled, just a few revolutions at a time. After a couple turns, use your level to check that the shelf is still straight. If it’s off, back the screws out slightly and adjust as needed. Once the shelf looks balanced, you can turn the screws in further, re-checking the level every few turns.
When the screws are about halfway in, test the shelf’s stability. Gently press down on both ends to ensure it feels solid and doesn’t wobble. If there’s any instability, back the screws out and re-level the shelf. It’s so much easier to make adjustments now than when the screws are fully tightened!
Continue slowly turning the screws, re-leveling, and testing the stability until the screw heads are completely flush with the underside of the shelf. Repeat the entire process with the remaining screws and pilot holes.
Do one final check to ensure the shelf is perfectly level and secure. If it is, congrats, you have a sturdy solid wood shelf installed in your whiskey barrel that feels as dependable.
Apply Wood Glue to the Shelf and Barrel
Now that the shelf boards are cut to size, let’s use some extra reinforcement. For this step, you’ll need wood glue, clamps, and patience.
Apply a generous bead of wood glue to the top edge of the barrel stave where the first shelf board will sit. Spread the glue evenly along the edge using a small tool.
Place one end of the first shelf board onto the glue and hold it firmly while you position the other end. Check that the board is level, then apply firm and even pressure for about 30–60 seconds as the glue starts to set.
Use clamps to securely hold the board in place while the glue dries. Place clamps every 6-12 inches along the edge. Tighten them firmly, but be careful not to overtighten, which could damage the wood.
Quickly wipe away any excess glue that squeezes out from under the board using a damp rag. Repeat the gluing and clamping process for any remaining shelf boards.
Let the glue dry completely as directed usually 3 to 6 hours. Once dry, you can remove the clamps. The wood glue creates a strong bond, ensuring your whiskey barrel shelf unit is rock solid for years to come and ready to hold everything from bottles to small sculptural objects or framed wall art.
Screw the Shelf Into Place Inside the Barrel
To attach the shelf inside the barrel, you need to firmly screw it into the staves.
Materials
- Wooden shelf (your finished piece!)
- Drill/driver
- 1 1/4-inch wood screws (check staves thickness first)
- Tape measure
Instructions
- Hold the shelf up inside the barrel to find the perfect height. You want it high enough to fit whiskey glasses underneath but still easily reachable. Mark the spot with a pencil.
- Measure the thickness of your barrel staves. Most are around 1 inch thick, so 1 1/4-inch screws should work perfectly, long enough to secure the shelf, but not so long they poke through the outside!
- Drill pilot holes through the shelf and into the barrel staves at your marks. This is key to preventing the wood from splitting.
- Drive the screws through the pilot holes to securely fasten the shelf inside the barrel. Check that the shelf feels sturdy and perfectly level before you start loading it up!
Give the shelf a test run with some weight to ensure it’s properly installed before your friends come over to christen your new whiskey barrel bar. Just like well anchored wall shelves, this custom barrel shelf should handle everyday wear and tear with ease.ng a wooden shelf inside a whiskey barrel is an easy DIY project. In no time at all, you’ll have a rustic bar setup perfect for displaying your whiskey collection. Happy drinking!
Style and Decorate Your New Whiskey Barrel Shelf
Now it’s time for the fun part: making your whiskey barrel shelf look absolutely stylish!
- Stain or Paint the Barrel: You can stain or paint the outside of the barrel to match your home decor. Use a wood stain or paint in a rustic color like brown, gray, or black to coordinate with your existing color palette and farmhouse décor or more modern spaces. Apply 2–3 coats, drying between each.
- Add Trim: Adding trim around the top edge of the barrel or the cutout for the shelf provides a finished look. Use stained wood strips that complement the barrel color. Secure the trim with wood glue and nails.
- Include Decorative Accents: Place a few carefully chosen decorative accents on or around your shelf to tie it into your room’s theme:
- Vintage bottles or decanters
- Small plants or succulents
- Lanterns or candles
- Baskets or picture frames
- Consider Lighting: Adding small LED strip lights, spotlights, or even string lights can beautifully showcase your barrel shelf. Use Edison bulbs or other rustic light fixtures to enhance the vibe, just as you might highlight a wall mirror.
- Label it (optional): For a personalized touch, stencil or paint the word “Whiskey” or your last name onto the front of the barrel. Use a cool rustic font that matches your style.
With some simple decorating, your DIY whiskey barrel shelf will become a stylish focal point in your home, right alongside your favorite decorative shelves. Enjoy.
Final Thoughts
You now have a gorgeous, rustic whiskey barrel shelf proudly displayed in your home! By following these simple steps, you successfully customized an authentic barrel and transformed it into highly functional home decor.
The hard part, the cutting and screwing, is over. Now comes the fun part: filling your new shelf with your favorite books, knickknacks, or, of course, bottles of whiskey! Pour yourself a glass and take a moment to admire your hard work. With some elbow grease and patience, you created a memorable piece that adds warmth and character to any space.
The next time friends visit, your barrel shelf is guaranteed to be a major conversation starter and a source of compliments. You can proudly tell them you built it yourself, the easy way!