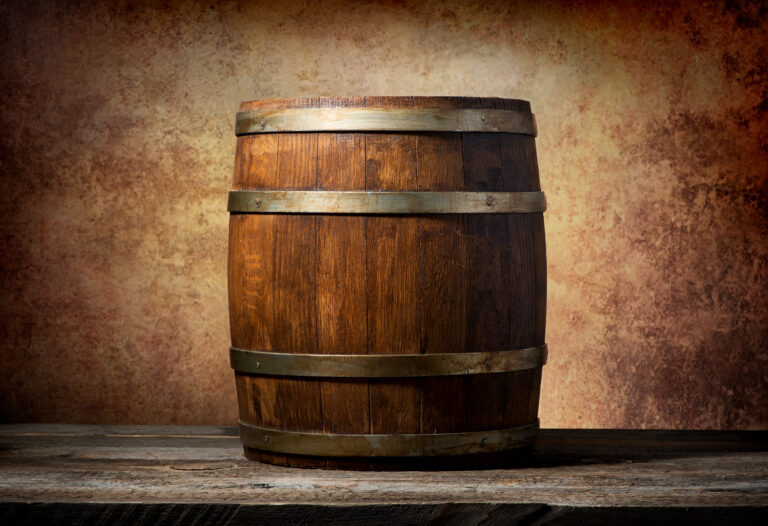
Got an old whiskey barrel collecting dust in your garage? Don’t let it go to waste—turn that barrel into a rustic tabletop for your home. It’s easier than you’d think and will give your place a touch of vintage charm. All you need are a few basic tools and the determination to take on a fun DIY project.
In just an afternoon, you can transform that whiskey barrel into a one-of-a-kind piece of rustic furniture. The distressed wood and metal bands of the barrel give it a weathered look you just can’t buy in stores. Your friends will be amazed you made it yourself. And the best part is, every dent, scratch, and imperfection only adds to its character.
So grab that barrel, roll up your sleeves, and let’s get started. With some sanding, staining, sealing, and attaching table legs, you’ll be enjoying drinks around your new barrel table before you know it. The perfect blend of rustic and industrial, this wood barrel table is sure to become the centerpiece of any room.
Gather Your Materials
To get started on your DIY barrel table, you’ll need a few essential supplies:
- A wooden top: Choose a circular piece of wood, ideally 1 to 2 inches thick, that’s slightly larger than your barrel’s rim. Cedar, redwood, or cypress are good options as they can stand up to weather.
- Wood glue or sealant: Waterproof wood glue will securely bond the top to the barrel. Alternatively, use an outdoor wood sealant for a non-permanent option.
- Sandpaper: Lightly sand the rim of the barrel and the underside of the tabletop. This will rough up the surfaces so the glue or sealant has something to grip.
- Clamps: Apply pressure as the glue dries to ensure an even bond and prevent warping. Ratchet straps, bungee cords, or bar clamps will all work.
- Felt pads (optional): Attach small felt pads to the underside of the tabletop. This prevents damage to the barrel and allows for easy removal of a non-glued top.
- Stain or sealant (optional): Match the color of your barrel with a stain or seal the tabletop with polyurethane for protection from weather and spills.
With the materials gathered and surfaces prepped, you’re ready to permanently or temporarily transform your whiskey barrel into a handsome table. The perfect place to enjoy an afternoon cocktail!
Prepare the Whiskey Barrel
To get that whiskey barrel ready, you’ll need to do some prep work.
First, thoroughly clean the inside of the barrel. Use a scrub brush to loosen any debris and then rinse well with water. Let it air dry completely.
Next, sand down the rim of the barrel to create a smooth surface for the tabletop to sit on. An electric sander will make quick work of this. Wipe away dust with a tack cloth.
Now, measure the diameter of the barrel opening so you can cut your tabletop to the proper size. For the most stable fit, cut the tabletop a half inch smaller than the barrel opening.
Once cut, apply weatherproof wood glue or epoxy around the rim of the barrel and place the tabletop on top. Clamp it in place as directed by the product instructions. Let it set until the bond is secure.
After the glue has dried, you might want to drill pilot holes around the rim of the barrel and screw the tabletop in place for extra stability. Counterbore the holes so the screw heads sit flush with the tabletop surface.
With some elbow grease and the right technique, you’ll have that whiskey barrel tabletop secured in no time. Now grab your favorite bourbon and put this rustic beauty to good use!
Measure and Cut the Table Top
To attach the DIY table top to your whiskey barrel, you’ll first need to measure and cut the wood to size.
Supplies
- Measuring tape
- Circular saw
- Sandpaper (80 to 220 grit)
- Wood glue
Measure Twice, Cut Once
Double-check your measurements before cutting the wood. You want the table top to overhang the rim of the barrel by about an inch on all sides. Measure the diameter of the top opening of the barrel. Then, measure the length of the staves (the barrel slats) to determine the circumference.
Cutting the Table Top
Clamp your wood down to a sawhorse for stability. Carefully cut the circular tabletop with a circular saw, jigsaw, or bandsaw. Smooth any rough edges with sandpaper.
Test the Fit
Place the DIY tabletop onto the barrel to ensure it’s balanced and the right size before attaching it. Make any minor adjustments by sanding the edges.
Glue and Clamp
Apply wood glue to the rim of the barrel. Center the tabletop in place. Clamp the tabletop down with bar clamps or pipe clamps and let the glue dry as directed.
Final Touches
Once dried, you might want to sand the tabletop edges and apply a sealant to protect the wood. Attach barrel bands around the edge of the tabletop for an authentic look. Now your whiskey barrel table is ready to use!
Sand and Stain the Table Top
Now that the barrel has been prepped, it’s time to sand and stain the tabletop. Start by lightly sanding the tabletop with fine-grit sandpaper (around 220 grit) to rough up the surface and provide “tooth” for the stain to grip onto. Wipe away dust with a tack cloth. Apply 2-3 coats of stain, waiting 30 minutes between coats. For a rustic look, choose an oil-based stain in a natural wood tone like oak, walnut, or pine. Let the final coat dry as directed.
Once stained and dry, you’ll want to seal the tabletop with 3 coats of polyurethane or lacquer sealant, waiting 2 hours between coats. The sealant protects the wood and provides a durable, water-resistant finish. For the smoothest finish, lightly sand between coats with 400-grit sandpaper. The final coat of sealant should be allowed to cure for at least 24-48 hours before placing heavy objects on the tabletop.
Your whiskey barrel table is now ready to use and admire! The natural wood tones and rustic style are perfect for a cabin, bar, or game room. Enjoy your handcrafted table for years to come. With proper care and maintenance, a barrel table can become an heirloom piece passed down for generations.
Attach the Table Top to the Barrel
Once you have your barrel prepped, it’s time to attach the tabletop. For this, you’ll need:
- The wooden tabletop
- Wood glue
- 4 metal brackets
- Drill/driver
- Screws
Attach the Top
Center the tabletop over the open end of the barrel. Apply wood glue around the rim of the barrel and place the tabletop on, pushing down firmly to adhere it in place.
Flip the barrel over so the bottom is facing up. Position a metal bracket at each corner, lining up the holes in the bracket with the staves of the barrel. Drill pilot holes, then drive screws through the brackets into the barrel to securely fasten the top.
Flip the barrel right-side up again. Apply another layer of wood glue around the edge of the tabletop for an even stronger bond. Let the glue dry as directed.
Your whiskey barrel tabletop should now be firmly attached and ready to use! Lightly sand any sharp edges and apply a sealant like polyurethane to the tabletop to protect the wood.
Add Finishing Touches
To give your whiskey barrel tabletop a polished look, add a few finishing touches.
Seal the Wood
Apply 2-3 coats of sealant, like polyurethane or lacquer, to the tabletop. This will protect the wood from stains and scratches. Lightly sand between coats with fine-grit sandpaper for the smoothest finish.
Distress the Edges
For a rustic look, you can distress the edges of the tabletop. Use a chisel, wire brush, or sandpaper to rough up and scrape the edges and create a worn appearance. Wipe away dust with a tack cloth.
Add Decorative Hardware
Decorative hardware, like barrel bands or hoops, helps complete the look. You can find bands that are the proper size to fit around a whiskey barrel. Secure them in place with wood glue and nails. Or, attach barrel hoops by drilling pilot holes and screwing the hoops to the underside of the tabletop.
Consider a Base
If you want to make a pedestal table, attach the barrel top to a wooden base. A turned pedestal base complements the rustic barrel top. You’ll need to cut the barrel down to size, then attach the top to a wooden base using wood glue and screws.
Brand or Stencil
For a custom touch, consider branding or stenciling a logo, name, or design on the tabletop. Use a wood-burning tool to brand an image onto the wood. Or, stencil on a design using paint. Apply a sealant over the top to protect your handiwork.
These final touches will make your DIY whiskey barrel table really stand out. In no time, you’ll have a rustic table perfect for your home decor.
Style Your New Whiskey Barrel Table
Now that the tabletop is secured to your whiskey barrel, it’s time to style it to your liking. Here are a few ideas to get you started:
- Stain or paint the barrel and tabletop. A dark walnut or espresso stain would give it a rustic look, or you can paint it in your favorite color for a bright pop. Apply 2-3 coats, waiting for each to dry in between.
- Add a tablecloth. A simple burlap tablecloth or patterned cloth napkins would help complete the look. Secure the tablecloth in place with clips or tape to prevent slipping.
- Include decorative accents. Place a small vase of flowers, a bowl of citrus fruit like lemons or oranges, a lantern, candles, or string lights on the tabletop. These accents will make your new table an inviting focal point.
- Protect the floor underneath. Place a rug, mat, or furniture sliders under the table legs to prevent scratches on flooring. The barrel bottom can trap moisture, so a protective layer is useful.
- Consider a tabletop sealant. Apply 2-3 coats of polyurethane or wax to the tabletop to protect the wood from spills and stains. Reapply every 6-12 months to maintain protection.
With some simple additions, you’ll have a stylish whiskey barrel table ready to use and enjoy for years to come. Let your creativity flow and don’t be afraid to change up the look. A DIY home decor project should reflect your unique personality!
Alternative Table Top Ideas
You have a few options for an alternative table top for your whiskey barrel.
Wood planks
Reclaimed wood planks are a great rustic choice. You can use boards that are the same width as the top of the barrel or pieces of varying widths for a more eclectic look. Sand down the wood and seal it with polyurethane for protection.
Stone tiles
Natural stone tiles like slate, bluestone, or travertine have an organic feel that pairs well with a whiskey barrel. Get unpolished tiles and have them cut to fit the top of the barrel. Space the tiles slightly apart for a grout-free installation. The irregular edges of the tiles will add visual interest.
Concrete
Pouring a simple concrete top is an industrial option. You can tint the concrete to complement the wood barrel. Embed items like stones, glass, or tile fragments in the wet concrete for texture before it dries. Seal the concrete with a clear sealant for protection and easy cleaning.
Metal
Galvanized metal sheeting provides an utilitarian accent. Have the sheet cut to size and drill holes around the edge to screw it to the top rim of the barrel. For a rustic patina, scrub the sheeting with steel wool and apply a coat of wax or sealant. Copper or zinc sheeting will develop a natural weathered patina over time.
Using an alternative material for the tabletop is an easy way to change the look and style of a whiskey barrel. Choose a top that matches your decor and complements the rustic charm of the barrel.
FAQ: Common Questions About Whiskey Barrel Tables
Do I need to seal the barrel before using it as a table? Yes, sealing the barrel will help protect the wood from stains and scratches. Apply 2-3 coats of sealant, waiting for it to dry in between coats. Polyurethane or lacquer work well for sealing whiskey barrels.
How do I prevent the barrel from rolling? You’ll want to install leg attachments to prevent the barrel from rolling. Barrel leg kits typically come with pre-drilled holes—just screw the legs into place according to the instructions.
How much weight can a whiskey barrel table hold? On average, a whiskey barrel table can support 200–500 lbs. The weight capacity depends on the size and condition of your specific barrel. It’s best not to overload the table, especially when you first start using it.
Can I put casters on a whiskey barrel table? Yes, attaching heavy-duty casters to the bottom of the barrel legs is a great way to make your whiskey barrel table mobile. Look for casters that can support at least 200 lbs each for the best results.
How do I prevent the barrel from smelling musty? To prevent musty smells in an old whiskey barrel, clean the inside thoroughly before sealing. Scrub away any residue with hot water and a degreaser like TSP. Let all parts dry completely, then seal both the inside and outside of the barrel with 2-3 coats of sealant. This will lock in the wood and prevent musty smells from developing.
Can I turn a wine barrel into a table? Yes, wine barrels also make great tables. The process is very similar to converting a whiskey barrel. Clean, sand, and seal the wine barrel, then attach legs to prevent rolling. Wine barrels may be slightly larger in size but can work well as casual tables.
Final Thoughts
So there you have it, a simple DIY project to give new life to an old whiskey barrel. You’ve sanded, stained, and sealed the barrel and cut a circle of wood to top it off. Now you’ve got a rustic side table perfect for holding drinks, decor, or whatever else you like. The best part is you did it yourself for barely any money. Next time you’re looking for an easy weekend project, consider what other plain wooden items you have lying around that could use a makeover. A little elbow grease and inspiration can go a long way. Crack open your favorite bottle of bourbon and enjoy your work—you’ve earned it!