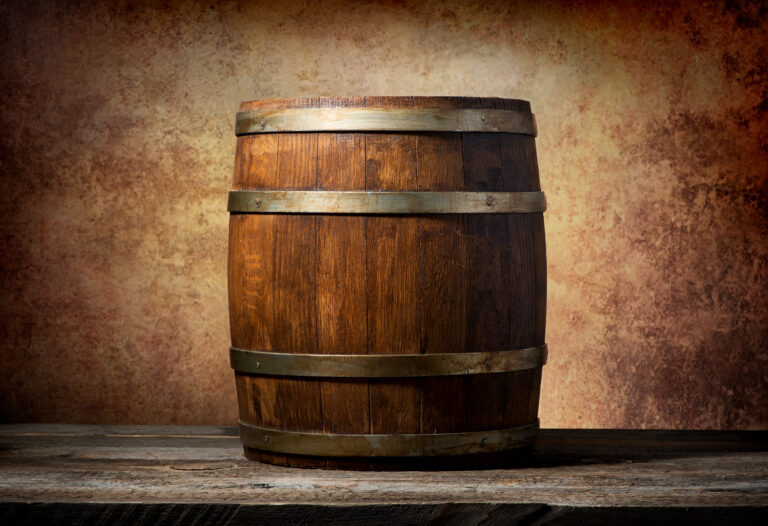
Ever wondered how easy it is to turn that old oak whiskey barrel into a super stylish table or stool? I’m here to tell you that adding hinges is a small but mighty step that instantly transforms a simple barrel into truly functional furniture. You probably have an antique barrel gathering dust in your garage, just waiting to be repurposed into a cool conversation piece for your home. With just a few basic tools and materials, you can create a unique, one-of-a-kind item that genuinely impresses your friends. Read on to discover how surprisingly easy it is to add hinges and hardware, breathing new life into that retired whiskey barrel. Before you know it, you’ll be sipping cocktails from your very own barrel table!
Gather Your Materials for Adding Hinges to a Whiskey Barrel
To get those hinges securely onto your whiskey barrel, you’ve got to gather a few essential supplies.
Hardware
Grab some sturdy barrel hinges, wood screws, and a drill/driver. Barrel hinges, which you can find at any well-stocked hardware store, are specifically designed to secure heavy wooden barrels. You’ll also want weather-resistant screws to make sure they hold up over time.
Wood
Pick up a few boards of untreated wood, ideally oak or redwood. You’ll need one board for each hinge, cut to roughly 6 to 8 inches wide and 10 to 12 inches long. These boards, known as hinge boards, are used to reinforce the area where the hinge attaches, giving it extra strength.
Safety Gear
Please don’t forget your safety glasses, work gloves, and hearing protection! Working with power tools and those heavy wooden barrels can be hazardous if you’re not careful.
Optional: Wood Filler
If your reclaimed barrel wood is cracked or slightly damaged, snag some wood filler. Applying it before hinge installation helps ensure the wood is secure and stable for the best possible bond.
With the right supplies and safety precautions in place, adding hinges to resurrect an old whiskey barrel is a straightforward process. Take your time, be careful, and before you know it, you’ll have a totally functional upcycled barrel ready for its new life as decor, storage, or whatever you dream up!
Preparing the Barrel for the Hinges
To get those hinges firmly attached to your oak barrel, a little prep work goes a long way.
Cleaning the Barrel
Give the inside of the barrel a really good cleaning to remove any dirt or residue. Rinse it out thoroughly with water and let it air dry completely.
Sanding the Edges
Lightly sand the edges of the barrel opening to smooth away any splinters or roughness. Don’t forget to wipe away all the dust with a tack cloth.
Measuring and Marking
Measure 3 to 4 inches in from each edge of the barrel opening and carefully mark the spots where your hinges will go. Use a framing square or a straight edge to ensure your marks are perfectly level before you start attaching the hardware.
Piloting the Holes
Use a hammer and nail (or a very small drill bit) to create pilot holes for your screws at each hinge mark. This simple step is vital, it prevents the wood from splitting when you drive the screws in.
Attaching the Hinges
Place one hinge over each set of pilot holes. Drive in the screws to secure them, double-checking with your level to make sure they are still straight.
Test and Tighten
Test the barrel top (or door) to see that it swings freely on the hinges, and make any minor adjustments needed. Fully tighten all screws, and you’re done! With a little patience, you’ll have your barrel furniture swinging smoothly in no time!
Measuring and Marking the Hinge Placement
To successfully install hinges on your whiskey barrel, you first need to figure out the exact placement. The most common spots for these barrel hinges are spaced evenly around the circumference.
Start by measuring the circumference of your barrel to locate the halfway point. Then, make two clear marks that are directly across from each other. These two spots will be your primary hinge locations.
Use a tape measure to find the distance between these marks and divide by two to find the exact center point. Make a mark there. Using a ruler, draw a straight vertical line through all three marks.
Next, hold one side of the hinge up to the barrel so the barrel rim is inside the hinge cup. Trace precisely around the hinge with a pencil, and repeat this on the opposite side. These outline marks show you where you might need to cut the wood away so the hinge sits flush against the barrel.
Use a jigsaw, rotary tool, or sharp chisel to carefully cut out the wood inside the outline. Test-fit the hinge in the cutout to ensure it sits perfectly flush with the barrel staves. You might need to slightly widen the cutout.
With the hinge sitting properly, use a pencil to mark the specific hinge screw holes. Predrill pilot holes, and then firmly attach the hinges using wood screws. Check that the hinges move freely and feel incredibly secure before filling the barrel.
Add a lid, or repurpose the barrel head, to cover the opening. Attach this lid using hinges as well, so you can easily access the contents. Your upcycled whiskey barrel is now ready to use as a rustic cabinet or barrel bar!
Cutting Mortises for the Hinges
To ensure the hinges sit neatly and professionally, you’ll need to cut mortises, which are essentially shallow recesses, into the barrel staves.
Start by clearly marking the placement for your hinges on the barrel. You typically want to space the hinges evenly around the circumference; 3 to 4 hinges are standard for a small barrel.
Use a sharp chisel to carefully cut the mortise. Place the chisel at a slight angle against the stave and tap firmly with a mallet to remove small wood chips. Repeat this at different angles until you have a recess deep enough for the hinge to sit perfectly flush with the barrel surface.
Test the fit of the hinge in the mortise. It should slide in snugly but still pivot freely. Use a wood rasp or file to slightly widen the mortise if necessary.
Once the hinge fits properly, you’re ready to attach them to the barrel staves. Drill pilot holes through the hinge holes into the wood, and then secure the hinges in place with wood screws.
Tighten the screws firmly, but please avoid overtightening, which can strip the wood.
Repeat this entire process to cut mortises and attach hinges all the way around the circumference of the barrel. Your barrel will now have a smooth, swinging door or lid, thanks to those handy hinges!
Installing the Hinges
Now comes the final attachment! It’s time to install those hinges onto your whiskey barrel. For the best performance, always choose heavy-duty hinges that can easily support the weight of the barrel lid. Barrel hinges or strap hinges are your ideal choices.
Preparing the Barrel
Lightly sand the area around the edge of the barrel lid and the corresponding area on the barrel rim. This step helps the hinges adhere much better. Wipe away any dust with a tack cloth.
Attaching the Hinges
Hold a hinge up to the barrel lid and rim to find the best placement. For a typical whiskey barrel, spacing the two hinges about 6 to 8 inches apart works perfectly.
Mark the spots for the hinge screws and drill pilot holes into the barrel wood.
Apply wood glue to the back of the hinge plates for an extra secure bond.
Secure the hinge plates in place with the wood screws. Tighten the screws firmly.
Check that the barrel lid opens and closes smoothly and properly. If needed, you can make very minor adjustments to the hinge positions.
Once the glue is dry, you might want to reinforce the installation by putting waterproof wood filler or sealant over the screw heads and any tiny gaps between the hinge plates and the barrel wood.
Your barrel furniture is now functional! Add decorative hardware like handles or clasps if you like. With those hinges attached, accessing items stored in your barrel is a breeze.
Adding a Latch to the Barrel Lid
To securely keep that barrel lid shut, you need to install a simple latch. Here are the easy steps to add one:
Materials Needed
- Barrel lid
- Two lid brackets
- Lid latch
- Four screws
- Power drill/driver
Instructions
- Position the lid brackets on the lid, about six inches in from the edge. The brackets should face inward, toward each other.
- Drill pilot holes in the lid using a drill bit slightly smaller than your screws.
- Secure the brackets firmly to the lid using two screws in each bracket. Tighten the screws with your drill/driver.
- Attach one end of the lid latch to one bracket. The latch should fit over the top of the bracket, with holes that align for screwing it in place.
- Bend the latch slightly to determine where the other end will attach to the second bracket. You want the latch to have some tension to keep the lid secured, so bend it to an angle less than 90 degrees.
- Attach the other end of the latch to the second bracket in the same way, screwing it in place so it maintains the necessary tension to keep the lid closed.
- Test the latch to ensure the lid stays securely closed. Make any small adjustments needed to the latch angle or bracket positions.
- Once the latch is working properly, you’re done! Your upcycled whiskey barrel lid will now stay shut but still be easy to open when you need it.
Staining and Sealing the New Hinges
Now that those barrel hinges are installed, let’s make them look like they belong! You’ll want to stain and seal the wood around the hinges to protect it and ensure an even color tone.
Sand the Hinges
Lightly sand the hinges (or the wood surrounding them) to slightly rough up the surface. This helps the stain penetrate the wood better. Wipe away all the dust with a tack cloth.
Apply Stain
Use a wood stain that perfectly matches your barrel, perhaps a deep bourbon brown. Apply 2-3 coats of stain, waiting 15-30 minutes between coats. More coats equals a darker color. Make sure to wipe away any excess after each coat.
Seal the Hinges
Once the stain is completely dry, apply 2-3 coats of sealant, like polyurethane. This protects the wood and gives it a durable finish. Allow each coat to dry as directed. The sealant may slightly alter the color, so always do a test in a less visible area first.
Attach the Hinges
When the sealant is dry, you can re-attach the hinges to the barrel. Place the hinges over the screw holes and secure them with wood screws. Tighten the screws firmly, but be very careful not to strip them.
Touch Up as Needed
Check all edges and seams for any spots that need a touch-up of stain or sealant. Apply as needed with a small brush, wiping away excess. Let it dry completely. Your hinges should now blend perfectly with your whiskey barrel!
Decorative Options for Barrel Hinges
Decorating the hinges or the area around them on your whiskey barrel can add amazing character and visual interest.
- Rustic Accents: Play up the rustic nature of the old barrel by adding decorative metal straps, brackets, or corner pieces. Distressed steel or hammered copper are excellent choices. You could also attach leather straps for a rugged look.
- Paint or Stain: For a fun splash of color, try painting or staining just the hinges themselves. A deep forest green or a bold navy blue are great options. For a more natural look, use a wood stain that complements the barrel wood.
- Etching or Burning: If you have artistic skills, you can etch a design into the wood around the hinges. Using a pyrography pen (wood burner) allows you to permanently brand decorative details into the wood. Just follow all safety precautions!
- Add Accoutrements: Small details make a huge difference. Attach things like vintage keys, small metal numbers, or interesting cabinet pulls for an eclectic flair. For a nature-inspired look, add small rocks, pine cones, or dried leaves around the hinges. Secure any additions with strong wood glue or epoxy.
These are just a few ideas to get your creative juices flowing. Have fun with it and make your upcycled barrel uniquely yours! The small details are what will turn your repurposed whiskey barrel into a true showstopper.
FAQ: Common Questions About Adding Hinges to Whiskey Barrels
Are hinges necessary to make a whiskey barrel functional?
Yes, hinges allow the barrel lid (often called the head) to open and close easily and properly. Without hinges, removing and replacing the lid would be awkward and could damage the barrel.
What kind of hinges should I use?
Sturdy metal hinges, like steel barrel hinges or strap hinges, are absolutely the best choice for whiskey barrels. Barrel hinges wrap around the barrel for maximum strength. Either type should have a rust-resistant finish.
How many hinges does a barrel need?
For most standard whiskey barrels, two to three hinges spaced evenly around the circumference is typical. More hinges may be needed for larger barrels. The hinges are ideally placed at the quarter points of the barrel.
How do I attach the hinges?
The easiest way to DIY is to drill pilot holes in the barrel staves and lid at the hinge marks. Secure the hinges to the barrel first. Then, drill corresponding pilot holes in the lid and attach the hinges using wood screws.
How do I adjust the hinges?
Barrel lids can warp or change shape over time. Adjust the hinges by slightly loosening or tightening the individual hinge screws in small increments to make sure the lid closes properly with an even gap all around.
With sturdy hinges and occasional adjustments, a whiskey barrel can provide years of enjoyment and storage.
Final Thoughts
So there you have it. With some basic tools, a few hinges, and a little bit of effort, you’ve transformed an old whiskey barrel into stylish barrel furniture. Now you can proudly display it in your home, patio, or garden as a decorative side table or plant stand. Your friends will be impressed with your handiwork and wonder how you managed to upcycle something so rustic into a modern accent piece.
But you’ll know the secret: with patience and the right hardware, you can give new life to reclaimed wood and turn something old into a functional treasure. Time to sit back, relax, and enjoy the fruits of your labor. Maybe even pour yourself a glass of whiskey to celebrate! You’ve earned it.