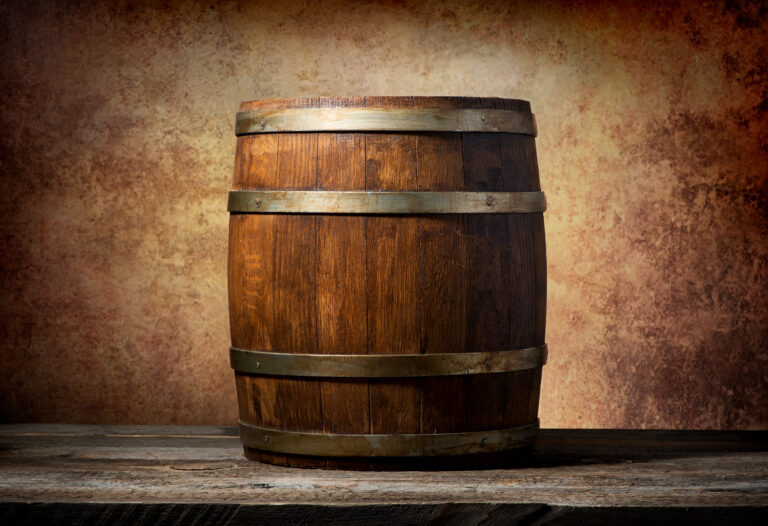
So you’ve got your hands on an old whiskey barrel and you’re wondering how to get it ready for its next life? It might seem like a huge job, but with a little effort and the right tools, you can get that barrel in great shape and ready for another round of spirits.
First up, you’ll need to rinse out any leftover residue—and we’re talking a lot of water and maybe some dish soap here. Grab a barrel brush and scrub the inside to loosen any stubborn bits. Once it’s rinsed and scrubbed, let it air dry completely. This can take at least a week, so be patient. Then the real work begins: sanding, torching, and re-charring the inside. With some elbow grease and determination, that old barrel will be revived and ready for many more years of aging and flavoring spirits. The effort will be totally worth it when you taste the first batch from your reclaimed barrel. Time to roll up your sleeves and get to it!
Why Bother Cleaning a Used Whiskey Barrel?
A used whiskey barrel has years of flavor built into the wood. Properly cleaning it before you reuse it lets you start with a blank slate, so you don’t end up with unwanted off-notes in your next batch.
First, empty out any remaining whiskey and rinse it thoroughly with hot water. Scrub the inside with a non-toxic cleaner to remove any residue.
Next, you need to sanitize the barrel to kill any bacteria. A solution of water and distilled white vinegar or citric acid works great. Swish it around and let it sit before rinsing it out again with water.
Now for the best part: charring the inside. Use a blowtorch to lightly char the wood, being careful not to scorch it. The char creates delicious flavor compounds and opens up the wood’s pores, allowing for better interaction with the liquid.
Finally, cure the barrel by filling it with a water and citric acid solution. This balances the pH and prevents any musty smells. Empty and rinse after about a week.
With a little bit of hard work, your used barrel will be as clean as new. Now it’s time to fill it with your favorite spirit and let the flavor development begin! A small amount of effort now will yield huge rewards down the road.
Supplies You’ll Need to Clean a Whiskey Barrel
To get started, you’ll want to gather the necessary supplies for your DIY project.
Cleaning Tools
You’ll need the basics: a scrub brush, sponge, and cleaning cloths. Don’t forget heavy-duty rubber gloves to protect your hands. For tough residue, keep a razor scraper and some fine-grit sandpaper on hand.
Cleaning Solutions
For a deep clean, a mixture of hot water, distilled white vinegar, and an eco-friendly degreaser like Simple Green works wonders. The vinegar cuts through grime and residue, while the degreaser tackles any caked-on oils. You’ll also want some baking soda to scrub away any remaining smells.
Rinsing and Drying
Have a hose ready to thoroughly rinse your barrel multiple times. Let it air dry completely to prevent musty odors. You may need to prop open the bunghole to improve airflow.
Optional Supplies
Consider using food-grade mineral or olive oil to condition the wood once it’s clean and dry. Fine-grit sandpaper (400+ grit) can smooth out any splinters. Steel wool (grade #0000) buffs out light scratches. Denatured alcohol can wipe away any leftover dirt and debris.
With the right supplies and some effort, you’ll have that used whiskey barrel clean and ready for its second life in no time. Let the fun begin!
Prepping the Barrel Before Cleaning
To properly clean a used whiskey barrel, you first need to prepare it.
Checking for Leaks
Turn the barrel over and inspect all the sides and seams for any obvious cracks or holes. If there are leaks, the wood may need repairs before you start cleaning. Small leaks can often be fixed with wood glue and clamps. For larger holes, you may need to replace wood pieces or install new metal bands.
Once you’ve fixed any leaks, flip the barrel back over and check the inside. Look for any stuck-on debris and wipe it away with a damp cloth. Give the barrel a quick rinse with water to remove any remaining residue. Let the excess water drain out.
Removing the Bung
The bung is the wooden stopper in the barrel’s opening. Use a wrench to unscrew the metal band securing the bung in place. Pull out the bung to fully open up the barrel. With the bung removed, you’ll have full access to properly clean and sanitize the entire inside of the barrel.
Optional Disassembly
For a truly deep clean, you can fully disassemble the barrel into individual staves. Remove the metal hoops with a wrench and carefully pry apart the staves. Clean each one individually before reassembling the barrel with the metal bands. Putting the barrel back together with clean, tight-fitting staves will help ensure there are no leaks before you fill it.
With the prep work done, you’re ready to thoroughly clean your used whiskey barrel. Scrub away any built-up residue and then sanitize it to make it food-grade. Once it’s clean and sanitized, you can refill the barrel with whiskey, wine, or even use it as a decorative planter. The possibilities are endless!
Scrubbing Out Whiskey Residue
To clean the inside of a used whiskey barrel, you’ll need to scrub away any leftover residue from the aging process. Fill the barrel about 1/4 full with hot water and some degreasing dish soap. Use a long-handled brush to scrub the inside, paying extra attention to any dark stains. Dump out the water and rinse it well.
For stubborn stains, make a paste from baking soda and water. Apply the paste with the brush and let it sit before rinsing well with water. You may need to repeat this a few times. An oxygen-based bleach can also help lift tough tannin stains from the wood without damaging it.
Once the inside is clean, thoroughly rinse and drain the barrel. To sanitize it, fill it with a solution of equal parts water and distilled white vinegar. Let it soak for at least 2 hours or even overnight. Rinse again with water until the water runs clear.
Allow all parts to dry completely before reassembling your barrel. Air drying is best, but you can also wipe down the inside with clean rags to speed up the process. Your barrel may retain some of the flavor from its previous contents, but scrubbing and sanitizing will remove any residue to prevent unwanted odors or contamination before reusing it.
With some hard work, you’ll have your used whiskey barrel sparkling clean and ready for its next batch in no time. Let the aging begin!
Sanitizing the Barrel to Remove Bacteria
To sanitize and clean a used whiskey barrel, follow these steps:
Scrub the Inside
Use a barrel brush to scrub off any debris or residue left over from the aging process. Rinse it well with water.
Sanitize with Boiling Water
Fill the barrel with water and heat it until it’s boiling. Let it sit for 15-20 minutes. Dump it out and rinse with cold water. The boiling water will kill any bacteria.
Ozonate (Optional)
For an extra level of sanitation, you can ozonate the barrel. Ozone is a natural disinfectant that will eliminate mold, bacteria, and other microbes. Ozonating kits can be purchased or rented from some homebrew supply shops.
Rinse Again
Give the barrel one final rinse with water to remove any excess sanitizer. Stand it on its end to air dry completely. Your barrel is now clean and ready for filling!
Consider Re-charring (Optional)
If you want to use the barrel for aging spirits again, consider having it re-charred. The charred interior, created by burning new wood staves, will impart that distinctive whiskey barrel flavor to the spirit. Re-charring a barrel requires specialized equipment, so you’ll need to have it done professionally.
Once sanitized and dried, a used whiskey barrel can have many useful applications around the home, from furniture to planters. But if you want it for further aging spirits, proper cleaning and re-charring are a must. With some effort and the right tools, you’ll have that barrel sparkling clean and ready for its next batch.
Rinsing Out Soap and Letting Dry
Now that you’ve cleaned the inside of the barrel, it’s time to rinse it out thoroughly to remove any remaining soap residue before drying.
To rinse out the soap, fill the barrel about 1/3 full with warm water. Seal the barrel and roll it around, swishing the water to loosen any remaining soap from the wood. Empty out the water through the bunghole.
Refill the barrel with clean, warm water and repeat the process, rolling and swishing the water around. Empty and refill with fresh water until the water runs clear.
Once rinsed, empty the barrel and let it air dry completely, which can take 7–14 days. Leave the bunghole open to allow for plenty of airflow. You can also place a fan near the opening to help speed up the drying time.
Check the inside of the barrel periodically as it dries. If any soap spots remain, dampen those areas and re-wipe them clean before re-sealing the barrel to continue drying.
When it’s dried, your whiskey barrel will be clean and ready for reuse. The long, slow air drying is crucial to prevent mold growth inside the barrel. With proper cleaning and drying, a used whiskey barrel can provide many more years of service.
Odor Removal Tips and Tricks
To get rid of stubborn odors from a used whiskey barrel, here are some tips and tricks to try:
Baking Soda
Baking soda is fantastic at absorbing and neutralizing odors. Pour about 1/2 cup of baking soda into the barrel and seal it up for a week or more. The baking soda will work to absorb the leftover whiskey aroma. Shake the barrel once a day to distribute the baking soda. After a week, empty and rinse the barrel with water.
Coffee Grounds
Used coffee grounds can also help eliminate odors from wood. Fill the barrel 1/3 full with damp used coffee grounds and seal for at least a week. The grounds will naturally deodorize the wood. Empty and rinse when done.
Activated Charcoal
Activated charcoal is very porous and excellent at trapping odors and chemicals. Place about 1 cup of activated charcoal in the barrel, seal, and leave for a week or more. The charcoal will absorb the odors over time. Be sure to dispose of the used charcoal properly when you’re done.
Vanilla Extract
For a more pleasant aroma, try placing 1/2 cup of vanilla extract in the barrel. Seal the barrel and slosh it around daily for a week. The vanilla will work to overpower the whiskey smell. You may need to repeat this a few times to fully eliminate the odor. Empty and rinse when done.
Time
If all else fails, time is your friend. Storing the empty barrel in a well-ventilated area for several months will allow the remaining odors to naturally fade. As the wood dries out, the odors will dissipate. You can also try some of the other tips in combination with letting ample time pass. With regular rinsing and the help of odor-eliminating agents, the smell should fade significantly over the course of 3 to 6 months.
Sealing and Storing the Cleaned Barrel
Now that you’ve cleaned your used whiskey barrel, it’s time to seal and store it properly. This will help ensure it stays fresh until you’re ready to fill it again.
Seal the Barrel
Apply a food-grade sealant, like beeswax or a barrel sealant product, to the outside of the barrel, especially around the rim and any cracks in the wood. Rub it on with a cloth, brush, or gloved hands.
For the inside, spread the sealant around the rim and any cracks, then roll and tilt the barrel around so it coats the entire inner surface.
Let the sealant dry as directed, which usually takes 24 to 48 hours.
Find a Cool Spot
Place the barrel in an area out of direct sunlight and extreme heat. A basement, garage, or shed is ideal. High heat and UV light can damage the wood and any remaining residue inside the barrel.
Keep the barrel raised off the floor on a stand or rack. This allows for airflow underneath and prevents moisture buildup.
Monitor Periodically
Check on your barrel every few months to make sure the seal is intact and the barrel is clean and dry inside.
If you see any signs of mold or musty smells, you may need to re-clean and re-seal the barrel before storing liquids in it again.
When you’re ready to fill the barrel again, re-clean it and apply a fresh coat of sealant for the best results.
Properly sealing and storing your used whiskey barrel will help keep it in great shape for many years to come. Be sure to keep it in a cool spot away from extreme heat and sunlight, raised off the floor, and check on it periodically to catch any issues early. By taking good care of your barrel, you’ll get many more uses out of this versatile container.
FAQ: Common Questions About Cleaning Whiskey Barrels
How do I clean a used whiskey barrel? Cleaning a used whiskey barrel properly is important before refilling or repurposing it. Here are some common questions and answers to keep in mind:
How much water should I use? Fill the barrel about 1/3 full with hot water. The water will expand the wood, loosening any remaining residue. Let it soak for at least 2 days.
Do I need to scrub the inside? Yes, use a barrel brush to scrub off any clinging bits of char or residue. Rinse thoroughly with water until the water runs clear.
Should I sanitize the barrel? Sanitizing is a good idea, especially if you’re repurposing it for home decor or furniture. Swab the inside with distilled white vinegar or a commercial barrel sanitizer. Rinse again with water.
Will the barrel retain the smell of whiskey? The barrel may retain some of the whiskey aroma, especially if it was heavily charred. Baking soda can help absorb and remove remaining smells. Seal the barrel to prevent musty smells from developing.
How should I dry the barrel? Stand the barrel on its end to allow water and airflow. Leave it in a warm area for at least 1 week. The barrel needs to dry completely to prevent mold growth before filling or sealing.
Do I need to re-char the barrel? Re-charring the barrel isn’t necessary for cleaning and sanitizing. Only re-char if you intend to refill the barrel for aging more whiskey or wine. Consult a cooperage for proper re-charring techniques.
I hope this helps answer some of the common questions about cleaning a used whiskey barrel. Let me know if you have any other questions. I’m happy to provide more details and recommendations.
Final Thoughts
So there you have it, a step-by-step guide to cleaning and rejuvenating a used whiskey barrel. While it might seem like an intimidating task, if you follow the proper procedures and are patient throughout the process, you’ll have a barrel ready for aging your favorite spirit in no time.
Think of the satisfaction you’ll feel when you sample that first drink aged in your very own barrel. The subtle oak notes blending with the existing whiskey flavors will make all the hard work worthwhile. Now get to it! Gather your supplies, put on some good music, and dive into this fun DIY project. Before you know it, you’ll be on your way to becoming a bonafide whiskey connoisseur.