So, you’ve got your hands on an old whiskey barrel and you’re dreaming of turning it into a fantastic planter for your patio or garden. Awesome idea! These weathered barrels have a natural charm and that lovely curved shape is practically begging for some greenery. But hold on a sec before you start scooping in the potting soil and your favorite blooms – that barrel needs a little love.
Don’t sweat it, giving an old barrel a new lease on life is a super straightforward DIY project. With some light sanding, a few coats of sealant, and maybe a splash of paint or wood stain if you’re feeling fancy, you’ll have that barrel back in working order in no time. And the best part? You’ll have a gorgeous, rustic planter that cost you next to nothing. Ready to transform that barrel into a beautiful home for your plants? Grab your supplies and let’s get started! This step-by-step guide will have your whiskey barrel planter looking picture-perfect in just a weekend.
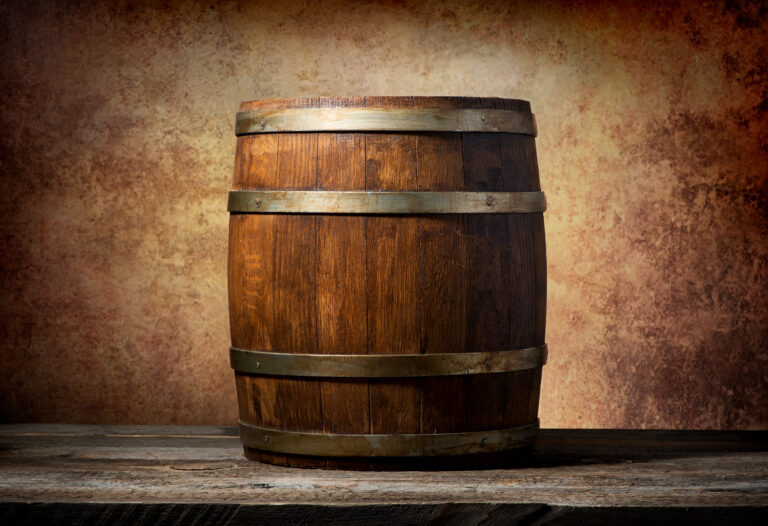
Introducing Whiskey Barrel Planters
Whiskey barrel planters are a simple DIY project that instantly adds rustic charm to your garden or patio. These repurposed barrels come with built-in character, and with a few drainage holes added, they’re perfectly sturdy containers for small trees, shrubs, or your favorite blooms.
To kick things off, you’ll need to source an authentic used whiskey barrel. Try reaching out to local distilleries or liquor stores – they often have barrels they’re ready to part with. Just make sure it’s food-grade and that the wood is still solid, without any major cracks.
Once you’ve got your barrel, grab a drill and create several drainage holes in the bottom. This is crucial for plant health! For good measure, place your barrel on a saucer to catch any excess water and allow for proper airflow.
Now for the fun part: fill the bottom with a layer of gravel for drainage, then add your chosen potting mix and, finally, your plant. If you’re going for small trees, a blend of perlite, compost, and soil works wonders. Shrubs are usually happy in regular potting soil.
Give your newly planted barrel a good, thorough watering and then find it a sunny spot. Remember, the wood of the barrel can contract in dry weather, so keep an eye on the soil moisture and water when the top few inches feel dry.
With the right care and a good location, your whiskey barrel planter will thrive for many seasons. The beautiful patina the wood develops over time only enhances its rustic appeal! Picture this: sipping an aged whiskey while enjoying your tranquil garden oasis. Pure perfection!
Common Issues With Whiskey Barrel Planters
Even the sturdiest whiskey barrel planters can encounter a few common hiccups, but don’t fret – they’re usually simple to fix.
Over time, the wood can start to dry out and develop cracks. To rehydrate, give your barrel a good, long soak. You can then seal any cracks with waterproof wood glue or caulk. To prevent this from happening in the first place, consider applying a wood sealant like tung or linseed oil once a season.
Drainage holes are notorious for getting clogged, which can unfortunately lead to root rot. Grab a screwdriver or a drill bit to clear those holes and get the water flowing again. You might even need to add a few more holes. If roots have already rotted, you’ll need to repot the plant.
The metal bands around the barrel, especially if scratched, can start to rust. Lightly sand away any rust, then apply a rust-preventing primer followed by a coat of paint. For more severe rust, you might even need to replace the bands entirely.
If your barrel is leaking, empty out the soil and re-seal any gaps from the inside using waterproof wood filler, caulk, or epoxy. For minor leaks, you can often fix them without removing the soil.
With a little regular TLC – that’s sealing, rehydrating, unclogging, sanding, and patching – your whiskey barrel planter can last for years and years. Stay on top of any issues, and both your barrel and your plants will continue to thrive!
Supplies You’ll Need for Repairing Your Planter
Ready to get your hands dirty and bring that whiskey barrel planter back to life? You’ll just need a few basic supplies.
Sandpaper
You’ll want both coarse sandpaper (think 60-80 grit) and fine sandpaper (around 150-220 grit). Start with the coarser grit to smooth out any rough patches and remove loose splinters, then finish with the finer grit for a silky-smooth surface.
Wood Filler
For any cracks, holes, or general damage in the wood, wood filler is your go-to for patching things up. Try to find a filler that closely matches the natural tone of your barrel’s wood. Apply it with a putty knife or spatula and let it dry according to the directions.
Wood Stain (optional)
If you’re looking to refresh or even change the color of your barrel, pick up some wood stain in your desired shade. Wipe-on or brush-on types are generally easiest to apply to barrels. Aim for 2-3 coats, letting each coat dry completely in between. This is a great way to enhance the rustic aesthetic.
Polyurethane (optional)
For serious protection against weather and moisture, apply 2-3 coats of polyurethane sealant. If your barrel will be living outdoors, make sure to choose an outdoor-rated polyurethane. Just like with the stain, let each coat dry completely before applying the next. This will significantly extend the life of your wooden planter.
Paintbrush (optional)
You’ll definitely need a paintbrush for applying both the wood stain and polyurethane. Look for one specifically designed for staining and sealing wood. A good brush will help you get into all the curves and ridges of the barrel.
Paint Tray (optional)
A paint tray is super handy for holding your wood stain or polyurethane, making it easy to dip and load your paintbrush. For quick cleanup, just line the tray with aluminum foil beforehand.
With some straightforward wood repair, a bit of sanding, and optional staining, your whiskey barrel planter will be fixed up and ready to last many more seasons. Let the DIY adventure begin!
Fixing Leaks in Your Whiskey Barrel Planter
If your whiskey barrel planter is letting out more than just good vibes, don’t panic – there are a few easy ways to stop those leaks.
First things first, carefully check the wood for any cracks, especially around the rim. Fill these in with wood filler, a strong sealant, or even waterproof epoxy. Make sure it’s completely dry before moving on.
Next, give the entire inside of the barrel several coats of a good sealant, varnish, linseed oil, or tung oil. Wipe away any excess after each coat. This will really help to waterproof and protect the wood.
You can also try using roof cement or caulk to seal any stubborn problem areas. Press it firmly into the wood to ensure a good seal.
For those tiny, sneaky leaks, a combination of waterproof wood glue and sawdust or a water-activated patch can work wonders. Mix them to form a paste and apply it directly over the leak.
If there are any holes or gaps in the metal bands around your barrel, try to tighten them, or even replace them if they’re too far gone. Adding extra metal strapping can also provide more reinforcement.
As a last resort, if leaks persist, you can line the inside of the barrel with a waterproof membrane or pond liner. Cut it to size, secure it in place with waterproof glue or roof cement, and fold the edges neatly over the rim of the barrel.
With a little TLC and patience, you’ll have your whiskey barrel planter sealed up and watertight again in no time. Your plants will definitely thank you!
Repairing Rotted or Damaged Wood
If your whiskey barrel planter has areas of rotted or damaged wood, you’ll need to tackle these spots to prevent further deterioration and keep your wooden planter strong.
Assess the Damage
Take a good look at your planter to figure out how severe the rot or damage really is. Minor surface damage can often be fixed with a bit of sanding, but deeper, soft, or “punky” wood will need to be cut out and patched.
Clean and Sand
Grab a wire brush and get rid of any loose wood fibers and debris from the affected area. Then, use sandpaper to rough up the surface around the damage – this helps any repairs you make adhere much better.
Apply Wood Patch Compound
For smaller cracks, holes, or surface imperfections, you can easily apply a wood filler or patch compound, which you can find at most hardware stores. Press it firmly into any gaps or cracks and smooth it flush with the surface. Let it dry as directed, then sand it to blend seamlessly with the surrounding wood.
Cut and Replace Rotten Sections
If you’re dealing with more extensive areas of soft, punky wood, you’ll need to cut out the damaged section. Use a jigsaw, circular saw, or even a chisel to remove the rotten wood, making sure to cut back to solid, healthy wood. Then, cut a new piece of wood to fit perfectly into that space, insert it, and secure it with wood glue and some nails.
Apply a Sealant
Once all your repairs are done and completely dry, it’s time to apply a sealant, such as tung or linseed oil. This will help protect the wood from future water damage and rot, ensuring the longevity of your outdoor planter. Reapply the sealant once a year or as needed to maintain that crucial protection.
Following these steps will help restore your whiskey barrel planter to a solid, stable condition so you can continue enjoying it for years to come. With regular maintenance and proper sealing, you can prevent future wood rot and keep your planter in tip-top shape.
Giving Your Planter a Fresh Coat of Stain or Paint
Ready to give your whiskey barrel planter a whole new look? Consider staining or painting the outside. Staining will beautifully highlight the natural wood grain and add rustic appeal, while paint will give it a solid, vibrant color. For this project, you’ll want to gather:
- Exterior stain or paint (choose what best suits your aesthetic)
- Paintbrush or stain pad
- Paint tray or roller
- Paint thinner or acetone (for cleaning brushes)
- Drop cloth (to protect your work area)
- Painter’s tape (for clean lines)
First, make sure your barrel is sparkling clean, free of any dirt or debris. Lightly sand any rough spots, then wipe away any dust with a tack cloth.
If you’re opting for paint, apply a coat of primer and let it dry as directed. For stain, especially on oak barrels, a wood conditioner might be a good idea – apply it as directed before staining.
Use painter’s tape to protect the inside rim of the barrel, ensuring a crisp line. Lay down your drop cloth under the barrel to keep your ground clean.
Apply at least two coats of your chosen stain or paint, patiently waiting for each coat to dry between applications. More coats generally mean better protection and coverage.
For the final touch, consider a sealant like polyurethane. This will really protect your finish and add extra water resistance. Two to three coats are usually the sweet spot. Give each coat a full 24 hours to dry before adding the next.
Once everything is dry and set, carefully remove the painter’s tape. Voila! Your refreshed whiskey barrel planter is ready to shine. With proper care and maintenance, a stained or painted finish can last a good 3-5 years before needing another freshening up.
Ideas for Decorating Your Whiskey Barrel Planter
Now that your whiskey barrel planter is ready, it’s time for the fun part: decorating! Here are some simple ideas to amplify its rustic charm and make it truly your own:
- Before adding your potting soil, layer the bottom with river rocks, pebbles, or gravel. This not only helps with drainage but also adds a lovely decorative touch.
- Embrace the barrel’s heritage by including whiskey or bourbon-themed decor. Think mini wooden barrels, vintage glass bottles, old corks, or even tumblers. These small touches create a truly authentic vibe.
- Wrap the outside of the barrel with burlap, jute, or hemp rope. You can even create and adhere rope handles to the sides, making it easier to move. The natural fibers beautifully complement the rustic wood.
- Incorporate metallic touches like galvanized buckets, watering cans, or lanterns. The mix of wood, natural fibers, and metal creates an attractive, multi-textured contrast.
- Plant lush, leafy foliage like ferns, ivy, ornamental grasses, or a variety of herbs. This softens the barrel’s edges and creates a bountiful, overflowing look.
- Add accent lighting such as string lights, charming lanterns, or subtle spotlights. This allows you to enjoy your planter day or night, creating a warm and inviting glow.
- Stencil or paint the barrel to personalize it. You could add numbers, meaningful words, delicate floral patterns, or even cool geometric shapes. A hand-painted barrel exudes a unique, cottage charm.
- Attach a chalkboard or a small wooden sign to label your plants or share a favorite whiskey-inspired quote. These little personal touches truly connect you to your garden.
With some creative decorating, your whiskey barrel planter can become a delightful garden accent and a genuine conversation piece! Use any of these simple ideas to make it uniquely yours.
Choosing the Right Soil and Plants
To get your whiskey barrel planter ready for its green inhabitants, you’ll need to fill it with nutrient-rich soil and carefully choose plants that are destined to thrive.
Soil
When it comes to container gardening, you want a loose, well-draining soil. Look for a mix that includes compost or perlite to help with both drainage and aeration. A pre-made potting mix, like Miracle-Gro, works wonderfully for whiskey barrels. Before adding your potting soil, line the bottom few inches of the barrel with gravel or stones – this is key for improved drainage.
Plant Selection
Choose plants that can handle a bit of drought and are comfortable with limited root space. Herbs, succulents, dwarf shrubs, and trailing plants are all fantastic options for your barrel planter. Here are a few recommendations:
- Herbs: Rosemary, thyme, chives, mint, or lavender
- Succulents: Sedum, echeveria, crassula, or sempervivum
- Trailing Plants: Petunia, calibrachoa, or verbena
- Dwarf Shrubs: Dwarf spirea, weigela, or potentilla
For the most visually appealing result, try planting a variety of colors, textures, and heights. You can stick to a single type of plant for a sleek, monochromatic look or mix and match for a vibrant, colorful medley. Remember to group plants with similar light and water needs together.
With the right soil and plants that are well-suited for container life and your specific climate, your whiskey barrel planter will be blooming and thriving in no time. Be sure to place it in a spot with plenty of sunlight and fertilize during the growing season. Water when the top few inches of soil are dry, and consider misting your plants if the weather is particularly hot. By providing what your plants need, you’ll soon be sipping an evening cocktail surrounded by a beautiful, lush garden.
FAQ – Answering Common Questions on Repairing Whiskey Barrel Planters
Got questions about bringing your whiskey barrel planter back to life? We’ve got answers!
Do I need to seal the inside of the barrel before using it as a planter?
Yes, it’s definitely a smart move to seal the inside of the barrel. This prevents wood rot and helps your planter last longer. Apply 2-3 coats of a good sealant, like polyurethane or a sturdy wax, and make sure each coat dries completely before applying the next.
How do I fix holes or cracks in the barrel?
For small cracks, a bit of wood glue and some clamps should do the trick. For larger holes, you’ll want to cut a wood patch to fit perfectly over the hole, then secure it with wood glue and reinforce it with waterproof wood filler or epoxy. Let the patch dry completely, then sand it flush with the barrel’s surface for a seamless look.
What about the barrel hoops? Do they need repair?
Absolutely! The metal hoops are crucial for the structural integrity of your barrel. Give them a good once-over for any damage or rust. If they’re badly damaged or very rusty, they should ideally be replaced. Sometimes, you might even need a professional to replace or tighten the hoops to ensure your barrel doesn’t fall apart.
How should I prepare the barrel for planting?
Once all your repairs are done and the inside is properly sealed, it’s time for the final touches. Drill drainage holes in the bottom of the barrel, spacing them about 6 to 8 inches apart. Fill the bottom few inches with rocks or gravel for excellent drainage, then add your potting soil and compost until the barrel is about two-thirds full. Now your barrel is perfectly prepped for your favorite plants, flowers, or vegetables! Don’t forget to water thoroughly right after planting.
With a little TLC, a used whiskey barrel can be transformed into a gorgeous planter that will grace your outdoor space for years to come! Taking the time to make those necessary repairs will ensure your barrel planter becomes a stunning centerpiece in your garden.
Final Thoughts
Alright, now that your whiskey barrel is all cleaned out and perfectly prepped, you’re officially ready to start planting! Begin by layering the bottom with about 6 inches of gravel for excellent drainage. Then, add your chosen potting soil and compost until the barrel is roughly two-thirds full.
Next, pick some fantastic plants that will truly thrive in a container, like your favorite herbs, beautiful succulents, or charming dwarf shrubs. Give them a good, thorough watering, and then find that perfect sunny spot for your newly transformed barrel.
Your whiskey barrel planter is bound to become a standout feature in your yard. Not only will it look absolutely amazing, but it also gives your plants a truly unique home with a touch of rustic charm. Every time you water your barrel or snip some fresh herbs, you’ll be reminded of its rich history and repurposed beauty. With a little TLC, this recycled barrel is sure to bring you years of gardening joy. Happy planting!