Ever looked at an old whiskey barrel and thought, “That would make an amazing planter!”? Well, you’re in luck – turning one into a beautiful garden container is surprisingly straightforward. All it takes is a trusty oak barrel, a few basic tools, and a bit of good old-fashioned elbow grease. First things first, you’ll want to give that barrel a good scrub. Hot water and a stiff brush will banish any lingering spirits or residue. Once it’s squeaky clean and dry, grab your drill! You’ll need to create several drainage holes in the bottom – about 1/2 inch in diameter, spaced 6 to 8 inches apart, should do the trick. No need for fancy gravel layers, the wood itself will handle the drainage. Now, the fun part: filling it up! These roomy barrel planters are absolutely perfect for a little herb garden, or even larger, hungry plants like tomatoes, peppers, or even cute dwarf fruit trees. With a little tender loving care, your repurposed whiskey barrel planter will become a gorgeous, rustic focal point in your outdoor space. Ready to roll up your sleeves? Let’s get started!
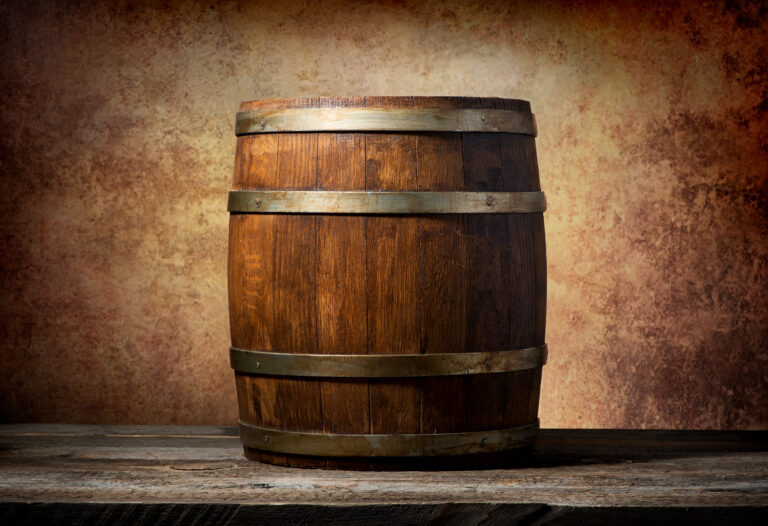
Choose the Right Whiskey Barrel
Selecting the perfect whiskey barrel for your planting adventure is key. Opt for a barrel crafted from sturdy oak that previously held bourbon or whiskey. These barrels naturally allow for excellent drainage and aeration, which your plant roots will absolutely adore. Steer clear of barrels that housed wine or chemicals, as their residues can be harmful to your green friends.
Look for a barrel with a rim diameter of at least 20 inches – this gives you ample space for both potting soil and your chosen plants. And a critical check: make sure it has sturdy steel hoops securely holding the staves together. You don’t want your beautiful container garden to spontaneously disassemble once it’s full!
Think about the barrel’s age. Newer barrels might still shed a bit of liquid, while older ones tend to be more porous, offering even better drainage. A barrel aged between 3 to 10 years is generally a sweet spot.
Consider the barrel’s interior finish. A charred interior, a hallmark of many whiskey barrels, adds so much character. A light toast or no charring works fine too, but try to avoid heavily toasted barrels, as they can release excess tannins into your soil.
Finally, double-check that any spouts, bungs, or holes are securely plugged before you start filling. You want to keep your precious soil and moisture in, and pesky critters out! Once you’ve found your ideal upcycled barrel, you’re officially ready to plant!
Clean and Sanitize the Barrel Thoroughly
Getting your whiskey barrel squeaky clean and germ-free is a crucial step before you introduce your beloved plants.
First, give the barrel a good rinse with water to wash away any loose dirt or debris. Grab a bottle brush and some dish soap, and really get in there to scrub the inside. Rinse, rinse, rinse until the water runs completely clear.
Next up: sanitizing. You can use a commercial sanitizer, or easily whip up a simple bleach solution: 1 part bleach to 9 parts water. Swish this solution around the inside of the barrel, making sure every surface is coated. Let it sit for at least 2 minutes, then rinse again with water until there’s no trace of bleach smell.
Finally, allow every part of the barrel to air dry completely before you even think about planting. This step is super important to prevent any unwelcome mold growth. You might need to prop the barrel on its side to ensure maximum drainage and airflow.
Once it’s bone dry, you’ll be all set to fill your repurposed barrel with potting mix and your chosen plants. By properly cleaning and sanitizing, you’re creating a pristine, contaminant-free environment for your plants to truly flourish. Your whiskey barrel is about to enjoy a very long and happy second life as a thriving garden planter!
Make Drainage Holes in the Bottom
To keep your plants happy and prevent soggy roots, you absolutely need to create proper drainage holes in the bottom of your whiskey barrel. This isn’t just an important step – it’s vital! Without adequate drainage, your green beauties can literally drown.
The easiest way to get those holes in your barrel is with a good cordless drill. You’ll want a sturdy drill bit designed for drilling through metal and thick wood. Start with just a few holes, around 1/2 inch in diameter. Remember, you can always add more holes, but you can’t un-drill too many!
Lay the oak barrel on its side and drill through the circular bottom at a slight angle. Begin drilling slowly until the bit catches, then apply firm, steady pressure. Be patient – drilling through the thick oak of a whiskey barrel can take a little time and effort.
Once you’ve drilled your initial holes, flip the barrel upright and fill it about a third of the way with water. Peek underneath to make sure water is flowing out freely. If it’s not draining well, you might need to add a few more holes. It’s always better to start with fewer and add as needed!
When it’s drained, empty the barrel and let it sit upside down or on its side to fully dry before introducing your potting mix and plants. Your DIY barrel planter is now ready for its exciting new life as a vibrant garden container! By starting with a few strategically-placed holes and then testing for proper water drainage, you’ll have the ideal barrel planter for your garden dreams.
Add Gravel or Stones for Drainage
To really ensure your whiskey barrel has top-notch drainage, you’ll want to add a foundational layer of gravel, stones, or perlite to the bottom. This creates essential air pockets, giving excess water somewhere to go. Without this vital drainage, your plant roots can quickly succumb to rot from too much moisture.
Spread 2 to 3 inches of pea gravel, river stones, or perlite in the bottom of the barrel before you add your potting soil. All these materials work wonderfully and are readily available at your local garden center. Perlite, a lightweight, porous rock, is especially ideal for container plantings. The gravel won’t compact over time like soil, providing a permanent airspace at the base of your barrel.
Adding a layer of landscape fabric or mesh screening over the gravel before you add soil is a smart move. This keeps the two layers separate, preventing fine soil particles from sifting down into the gravel. You can either staple the fabric to the sides of the barrel or simply hold it in place with the weight of the soil.
With the addition of gravel and fabric, your whiskey barrel will boast the perfect drainage and aeration needed for happy, thriving garden plants. The gravel acts as a reservoir, allowing excess water to collect so your plant roots aren’t sitting in soggy soil. This simple step truly sets your barrel garden up for success right from the start.
Line the Bottom With Landscape Fabric
Before you lay down that first layer of rocks, a smart gardener places a sheet of landscape fabric along the bottom of the whiskey barrel. Think of it as an extra layer of security – this fabric will help keep your rocks and soil from slipping through the drainage holes as your barrel ages and gets used.
You can snag landscape fabric at most gardening centers. Look for one that’s porous enough to let water drain through but tightly woven enough to hold your rocks and potting soil firmly in place. Secure the fabric around the edges of the barrel using zip ties, sturdy rope, or even strong double-sided tape. Make sure the fabric lies as flat as possible along the bottom – any bumps or folds can create sneaky gaps for rocks and soil to escape.
Testing the Fabric
Once your fabric is securely in place, add a few inches of rocks and a bit of soil to weigh it down. Fill the barrel about a third of the way full, then take a peek underneath to make sure the fabric is holding tight. If you spot any spots where gaps are forming or the fabric is sagging, you might need to adjust your securing ties or add another layer of reinforcement, like a bit of wire mesh, before you continue. It’s always best to test the fabric before your barrel is fully planted to avoid the hassle of emptying and relining it later!
With your landscape fabric securely in place, forming a durable bottom barrier, you can confidently begin filling your whiskey barrel planter. Layer in your rocks, container gardening soil, and chosen garden plants, keeping that fabric neatly weighed down beneath it all. Your upcycled barrel will be ready to thrive for many wonderful gardening seasons to come!
Fill the Barrel With Quality Potting Soil
Now that your whiskey barrel is sparkling clean and prepped, it’s time for the good stuff: filling it with high-quality potting soil so you can get planting! For the very best results, seek out a soil specifically formulated for container gardening or raised planters.
A really good potting mix should:
- Be wonderfully lightweight and drain superbly. Since your barrel planter doesn’t have open ground underneath, soil that holds too much moisture can quickly lead to dreaded root rot.
- Contain compost or composted manure to provide a steady supply of natural nutrients to your growing plants.
- Have a neutral pH between 6 and 7 – happy plants love this range!
- Include perlite or vermiculite to dramatically improve both drainage and aeration.
You want your plants to have the perfect environment to truly flourish, so please, don’t skimp on the potting soil. For most whiskey barrels, you’ll need at least 1 to 3 cubic feet of potting mix to fill it about two-thirds full. Remember to fill the bottom third of the barrel with some gravel or stones for that extra layer of drainage before you add your potting soil. Once it’s filled, water it thoroughly until the excess water happily flows out the bung hole. This will help settle the soil nicely before you start planting.
Your whiskey barrel is now officially ready for you to plant and arrange your favorite flowers, herbs, vegetables, or even trailing annuals. The possibilities are truly endless! With the proper care and maintenance, your barrel garden will provide you with beauty and delicious bounty for many seasons to come.
Consider Adding Amendments Like Compost
To truly help your new whiskey barrel planter thrive, think about adding some helpful amendments to improve your potting soil before you start planting. Compost is absolutely ideal for enriching the soil in your barrel.
Compost works wonders by helping to balance the pH level in the soil and providing a steady stream of vital nutrients to feed your plants. Add 2 to 3 inches of good quality compost to the bottom of the barrel before you fill it with your main potting mix. For the best results, use compost made from plant materials, grass clippings, and food scraps. Manure-based compost can sometimes be a bit too “hot” for container planting.
You might also want to consider adding:
- Perlite or vermiculite to boost drainage and aeration even further.
- Peat moss to help the soil retain just the right amount of moisture.
- Time-release fertilizer for consistent feeding throughout the entire growing season.
These thoughtful amendments will transform the soil in your whiskey barrel into the perfect environment for your garden plants to absolutely thrive. Your plants will reward you with vigorous growth and maximum blooms or produce.
Just be sure not to over-amend the soil, as too many additives can sometimes negatively impact the soil structure and nutrition. Always follow the recommendations on the product packaging for how much to add based on the size of your garden container. With the right balance of nutrients and the perfect amount of each amendment, your whiskey barrel planter will become a miniature ecosystem sustaining happy, healthy plants!
Decide Which Plants to Grow
Now that your whiskey barrel is perfectly prepped and waiting, it’s time for the exciting part: deciding which plants will truly flourish in its cozy confines! Here are some fantastic options to consider for your barrel garden:
- Herbs: Rosemary, thyme, chives, mint, basil, and oregano are brilliant herb choices for a whiskey barrel. They do wonderfully in the limited space and typically require minimal maintenance. Plus, imagine having fresh, aromatic herbs just steps from your door!
- Strawberries: Ever dreamed of plucking sweet strawberries right from your own container garden? Whiskey barrels are ideal for growing strawberry plants. Their shallow, wide shape gives strawberry runners plenty of room to spread out and produce an abundance of delicious fruit.
- Tomatoes: Compact, dwarf tomato varieties like ‘Husky Cherry Red’ or ‘BushSteak’ are perfectly sized for whiskey barrels and will reward you with a crop of juicy, homegrown tomatoes. And because your barrel will likely be close to your home, those fresh tomatoes will be super easy to pick and enjoy!
- Flowers: For a delightful burst of color, plant vibrant flowers like petunias, marigolds, begonias, or geraniums. Their bright blooms will not only beautify your space but also attract beneficial pollinators like butterflies and hummingbirds to your garden. And at the end of the season, you can easily switch them out for more herbs or vegetables.
The possibilities truly are endless with a whiskey barrel planter. No matter which garden plants you choose, with the proper care and maintenance, your upcycled barrel will become a lush oasis of foliage, herbs, flowers, or vegetables to enjoy all season long.
FAQs: Answering Common Whiskey Barrel Garden Questions
Got some burning questions about using a whiskey barrel as a planter? We’ve got the straightforward answers you need!
How long will a whiskey barrel last as a planter? Properly maintained, a whiskey barrel can happily serve as a garden container for 3-5 years. The wood will eventually start to decay and may leak, so keep an eye out for any signs of rotting wood or soil escaping from the sides.
Do I need to treat the inside of the barrel first? Yes, it’s definitely a good idea to clean, sanitize, and even seal the inside of the barrel before using it as a planter. Scrub away any residue, rinse thoroughly with water, then consider applying a sealant like polyurethane. This protective layer will help prevent the wood from rotting prematurely and extend the life of your barrel planter.
How often do I need to water plants in a whiskey barrel? Make it a habit to check your barrel plants regularly, especially during hot or dry weather. The barrel’s material and shape can cause the potting soil to dry out more quickly than in an in-ground garden. Water when the top few inches of soil feel dry to the touch. It’s best to thoroughly soak the soil until water flows out the drainage holes. However, never leave plants sitting in standing water – good drainage is key!
What kinds of plants work well in whiskey barrels? Whiskey barrels are fantastic for cascading plants like petunias, verbena, nasturtiums, and geraniums, which will beautifully spill over the edges. Herbs, lettuces, dwarf tomatoes, and bushy annuals also thrive in these garden containers. Choose plants that won’t quickly outgrow the barrel. Perennials and shrubs are generally not the best long-term options for this type of planter.
With the right care and consistent maintenance, a whiskey barrel planter can truly make a stunning addition to any garden, patio, or deck. Keep your barrel in a sunny spot that gets plenty of light, water and fertilize regularly, and you’ll be enjoying homegrown whiskey barrel bounty in no time!
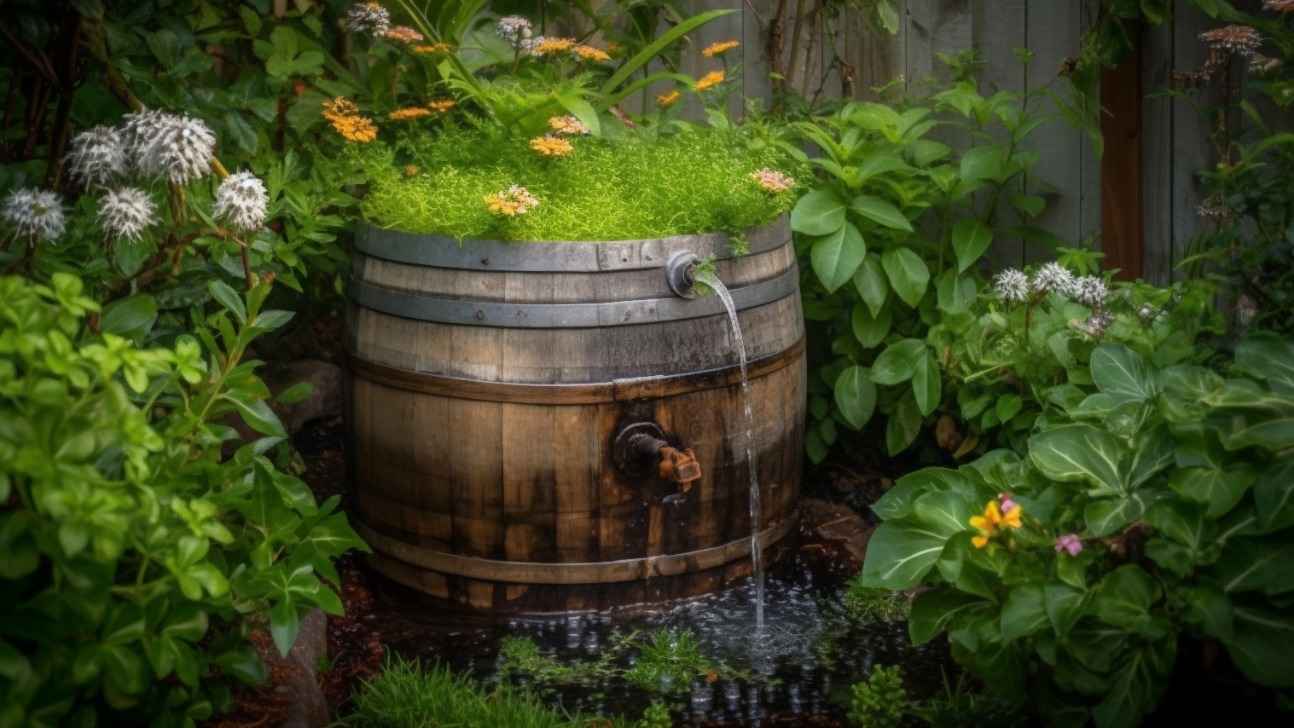
Final Thoughts: Your Rustic Garden Masterpiece Awaits!
So there you have it – the complete, step-by-step guide to transforming an old whiskey barrel into a magnificent garden planter! By following these simple steps to clean, prepare, and set up your barrel, you’ll have a wonderfully rustic and charming container garden ready to beautifully showcase your favorite flowers, vibrant herbs, or striking succulents on your patio or in your garden.
The natural wood tones and classic metal hoops of these upcycled barrels lend such a timeless, authentic look that will perfectly complement any outdoor decor. And of course, every time you gaze upon your flourishing barrel garden, you’ll be gently reminded of the rich history behind these barrels and the fine spirits they once lovingly held. With just a little tender loving care, an old whiskey barrel can embark on a vibrant second life, bringing beauty and bounty to your outdoor living space. Now, go find yourself a perfect barrel, get your hands wonderfully dirty, and most importantly, happy planting!