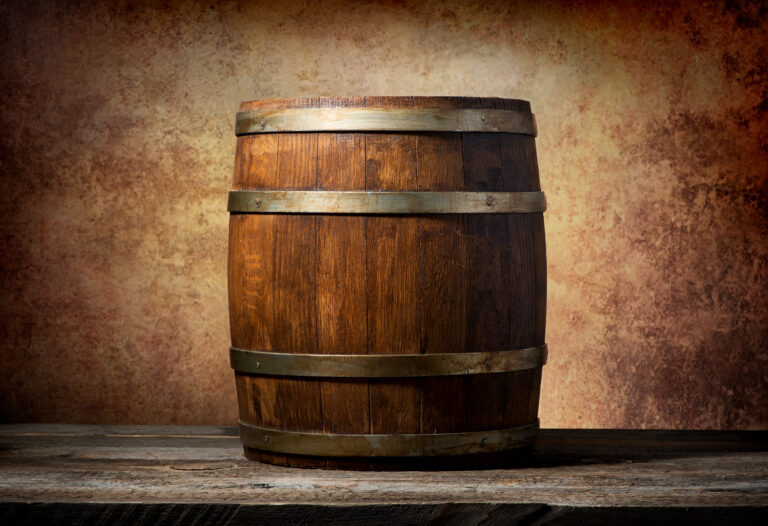
So, you decided to try your hand at woodworking and tackle building a whiskey barrel planter? Awesome idea! Those rustic half barrels instantly add charming outdoor decor to any patio or garden. But now you’re staring at a chaotic pile of wooden staves and metal hoops and probably wondering how on earth you’re supposed to put this puzzle back together. Don’t sweat it, we totally have your back! Reassembling a half barrel planter is completely manageable if you just follow a few simple steps. By the end of this post, you’ll be well on your way to enjoying your homemade half barrel planter overflowing with your favorite greenery or blooms. Just grab your wood glue, a mallet, and a few clamps, we’ll walk you through the rest.
Gather Your Supplies: Screws, Drill, Wood Glue
To securely put your whiskey barrel planter back together, you need a few basic supplies that are probably already in your garage.
Gather some wood screws, a drill/driver, wood glue, and a rag. The screws should be 2 to 3 inches long to ensure they securely join the staves. Make sure your drill bit is slightly smaller than the screw gauge.
Apply wood glue generously to the inside edges of the stave grooves, then clamp the barrel staves together firmly. Wipe away any excess glue quickly with the rag. Predrill pilot holes, this is key!, then drive the screws into the staves, spacing them about 6 to 8 inches apart.
Tighten the Hoops
Once the staves are secured with screws and glue, you can slide the metal hoops back on. Start with the bottom hoop and work your way up, tapping each hoop into place with a rubber mallet.
Tighten the hoops by hitting them firmly with the mallet, checking with each whack that the staves remain evenly spaced and tight. If you have a friend nearby, an extra set of hands here can really help keep everything balanced.
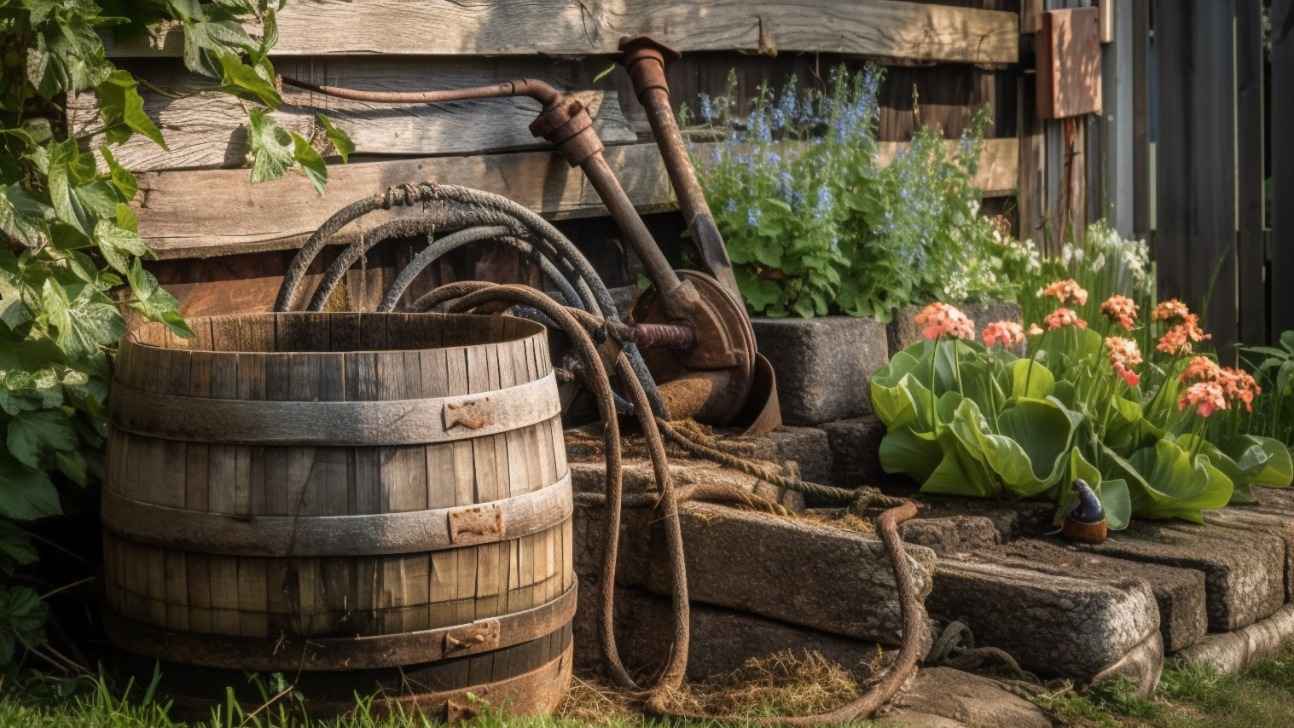
When the planter is reassembled and the hoops are snug, you’re ready to fill it! With the proper maintenance, a whiskey barrel planter can last for years.
Lay the Staves Out in Order
Now that you’ve got all your wooden staves laid out, the actual barrel reassembly can begin.
First, select two staves to form one side of the barrel. Line up the grooves precisely and gently tap the edges together with a mallet to secure them. Do the same with two more staves for the other side.
Next, take one of the circular barrel heads and place it over the bottom end of the two sides you just formed. The beveled edge should face inward. Pound the metal hoops over the barrel head to hold everything in place.
Then, start adding pairs of staves in between the sides and pound in another hoop. Keep adding pairs of staves and hoops, tapping each layer firmly, until you’ve reassembled about two-thirds of the barrel.
At this point, you’ll need to add the second barrel head over the open end. Pound the final metal hoops over the top barrel head to seal up your planter.
Use a level to ensure your barrel planter is perfectly balanced. If necessary, drill a drain hole in the bottom. Now, stand back and admire your handiwork, you’ve built a charming rustic planter ready for your favorite blooms!
Apply Wood Glue to the Inside of Each Stave
To securely reassemble your whiskey barrel planter, you need to apply wood glue to the inside edge of each stave (those curved wood planks) so they stick together perfectly snug.
Use a paintbrush to spread wood glue along the inside edge of one stave. Coat the last few inches of the stave where it will meet the next one. Do the same with the adjacent stave, coating its inside edge. Then, press the staves firmly together, glue sides touching, and hold them in place. Use strong clamps, elastic bands, or rope to keep the staves secured as the glue completely dries.
Repeat this process, gluing and clamping staves together one by one until the entire barrel is reassembled. Let the glue dry for a full 24 hours before handling the barrel or moving on. This wood glue creates a strong, water-resistant bond, helping ensure your whiskey barrel planter holds soil and moisture without leaking.
Be sure to wipe away any excess glue that squeezes out between the staves with a damp cloth before it dries. Keep gluing and clamping, and be patient through the process. Your whiskey barrel planter will be sturdy and ready for potting soil soon!
Reassemble the Barrel Bottom
Now that the barrel planter is disassembled, let’s focus on building that solid foundation.
The barrel bottom (or base) is what provides the essential structure for your planter.
Place the barrel bottom face down on a flat surface, the inside should be facing up. Attach the barrel staves around the outer edge of the barrel bottom using wood glue or waterproof wood sealant. Make sure the staves are evenly spaced to form a perfect circle. Secure the staves in place with strong wood clamps or straps while the glue dries. Let it dry completely according to the product instructions. Once dry, release the clamps and flip your barrel upright. The barrel bottom and staves should now be firmly attached and watertight. Now you can add soil and plants to your reassembled half whiskey barrel planter!
Attach the Bottom Hoops
To reassemble your half whiskey barrel planter, the bottom hoops are essential for holding the staves tightly in place.
Once you have the staves arranged in a circle, place one of the bottom hoops over the lower end of the staves. Line up the groove in the hoop with the groove in each stave.
Hammer the hoop down into place using a rubber mallet. Work your way around the hoop, tapping it down evenly.
Check with a level to make sure the hoop is straight as you go. If it’s not, the staves won’t fit together properly. Remove the hoop and adjust the staves as needed.
Repeat the same process for the second bottom hoop. Place it a few inches up from the first hoop. Hammer it into place, checking that it stays level.
With the bottom hoops attached, your staves should now be held firmly together in the classic barrel shape. Your half whiskey barrel planter is truly starting to take shape!
Stand the Bottom Section Upright
Now that the base is secure, it’s time to stand the bottom section of the barrel upright. This step is definitely easier with two people, so grab a friend to help you out!
Carefully tilt the bottom section onto one rim. Have your helper grasp the opposite rim to slowly lift and rotate the section into an upright position. Remember to lift with your legs to avoid injury! Once upright, the bottom rim should sit flat on the ground.
Check that the bottom section is level for perfect stability. You can place a level on the inside rim to check. If it’s not level, adjust it by tapping the rim edge gently with a rubber mallet.
Double-check that the interior metal bands are still securely in place. These bands provide structure and help the staves maintain their curve. If any have come loose, repair them now.
You now have the bottom section standing and ready for the next pieces. Halfway there! With the bottom firmly established, the rest of the reassembly will go smoothly.
Add Wood Glue to the Top of Bottom Section
Now that you’re ready to join the separate pieces of your barrel, wood glue is your secret for the strongest bond.
Apply the Wood Glue
Generously apply wood glue to the top edge of the bottom section, coating the entire rim. Use a paintbrush to spread it evenly. Let the glue sit for 2 to 3 minutes so it gets slightly tacky, this helps it adhere better to the wood. Next, gently place the top section of the barrel onto the bottom section, aligning the groove edges. Push down firmly so the glue creates a strong, tight seal all the way around.
Secure the Pieces
To ensure the pieces stay together as the glue dries, you need to clamp them or weigh them down. Place several clamps around the rim of the barrel, tightening them securely. Alternatively, you can wrap rope tightly around the barrel or simply place heavy objects like bricks or jugs of water on top.
Let It Dry
Keep the barrel stationary as the wood glue dries. For the strongest bond, this usually takes a full 24 to 48 hours. Resist the urge to move or handle the barrel during this time! Once dry, remove the clamps or weights. Your whiskey barrel planter should now be securely reassembled and ready to use!
The wood glue creates a durable, water-resistant seal that will hold up well outdoors. For extra protection, you can apply a sealant or outdoor-rated polyurethane to the inside of the barrel. This prevents moisture damage to the wood over time.
Lower and Attach Top Section
To reattach the top section of your whiskey barrel planter, you’ll need: wood glue, a mallet, and some metal fasteners (hoops or straps).
Apply Wood Glue
Apply a thick bead of wood glue around the top rim of the bottom section. Make sure you have full coverage so there are absolutely no gaps. Let the glue get tacky for a few minutes.
Attach Metal Bands
Gently place the top section onto the bottom section, the wood glue will hold it in place initially. If you are using external straps or hoops, wrap two metal bands around the barrel and secure them tightly with pliers. Tap the bands with a mallet to ensure they are firmly set.
Tighten Bands
Once the glue is dry, you may need to further tighten the metal bands. Go around each band, tightening in small increments with the pliers and mallet. This ensures an even, secure attachment of the two sections.
Seal and Decorate (Optional)
For an extra secure bond and sleek look, you can apply a waterproof wood sealant around the join and rim of the barrel. You can also add decorative accents like a wooden rim or metal straps. This helps hide the join and gives your planter a finished, rustic, crafted appearance.
With some wood glue, metal fasteners, and elbow grease, you’ll have your whiskey barrel back in one piece and ready for planting season!
Add the Top Hoops and Allow the Glue to Dry
Once the bottom hoops are securely in place, you’re ready to finish the barrel by adding the top hoops. Apply wood glue to the top edge of the staves where the top hoops will rest. Place the top hoops over the staves and press down firmly so they adhere to the glue.
Use clamps, straps, or rope to hold the top hoops firmly in place while the glue dries. Let the glue dry for at least 24 hours before removing the clamps. Check that the top hoops are securely attached and the barrel feels sturdy. If it doesn’t, apply additional glue and re-clamp until it’s fully adhered and dry.
Pat yourself on the back, your whiskey barrel planter is now fully reassembled and ready to use! You can fill it with potting soil and your favorite plants, or just leave it as-is for a rustic decorative container. With some care, your barrel planter will provide many years of enjoyment.
Final Thoughts
So there you have it, your step-by-step guide to reassembling a whiskey barrel planter. With some basic tools, a little elbow grease, and patience, you’ve got that barrel back together and ready to hold your favorite flowers or plants in no time. When all is said and done, stand back and admire your handiwork. That reassembled barrel planter will make a great conversation piece and really elevate your outdoor space. And the next time it needs some TLC, you’ll know exactly what to do to get it fixed up. Not too shabby for an afternoon’s work!
Now grab yourself a cold one, you’ve definitely earned it.