You love to craft, but those empty whiskey barrels sitting around your workshop have you totally stumped on what to build next. Well, stumped no more! In this article, we’ll walk through a super easy DIY whiskey barrel furniture project: a rustic three-tier shelf that’s perfect for proudly displaying your favorite knickknacks or books. We’ll talk specifics on how to craft beautiful, custom shelves using the barrel’s wooden staves along with basic tools you probably already have handy. You’ll learn our best tips to sand, stain, and seal the wood into a gorgeous focal piece. Whether your personal style is classic modern farmhouse or sleek industrial chic, this adaptable whiskey barrel shelf will instantly add a touch of charming character to any room. Let’s get started crafting your own stave masterpiece!
The Allure of Whiskey Barrel Furniture
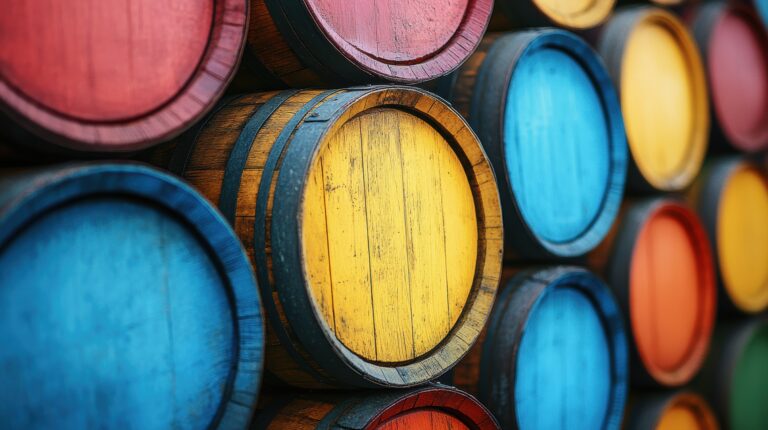
Timeless Rustic Charm
Whiskey barrel furniture simply oozes rustic charm and character. The aged wood and metal hoops instantly remind you of the barrels’ original purpose, giving each piece a wonderful sense of history and story. This timeless style perfectly complements both traditional and modern decors, blending seamlessly into any living space.
Unique, Durable Materials
Whiskey barrels are constructed from white oak, which is one of the hardest and most durable woods available. The staves, those narrow strips of wood that make up the barrel, are bound by sturdy metal hoops, originally used to hold the barrel together during the aging process. These rugged materials stand up incredibly well to daily use and are built to last for generations.
Customizable Style
Whiskey barrel furniture offers tons of opportunities for customization. The wood can be sanded and re-stained in any color to match your specific decor. You can also repurpose individual barrel staves and hoops in creative ways, building shelves, tables, and accents. For that classic rustic look, leave the wood as-is, showcasing the natural patina from years of aging whiskey.
With its rustic and timeless style, durable construction, and high customizability, it’s easy to see why whiskey barrel furniture has such lasting appeal. Crafted from a piece of history, each item tells a story and lends a sense of warmth and character to any space.
Sourcing Authentic Whiskey Barrels for Projects
If you want to craft with real whiskey barrels, you absolutely need to find a reputable source. While some big box stores sell barrels used for wine or sherry, the best place to look for authentic whiskey oak is a barrel broker or local craft distillery.
Check Local Distilleries
Visit some nearby craft distilleries and simply ask if they have any used barrels for sale. Smaller operations are usually more likely to sell barrels individually. You might be able to get a great deal on barrels that were used for just one aging cycle and still have plenty of character left for your projects.
Buy from a Barrel Broker
Barrel brokers source authentic used barrels from distilleries across the country and resell them. Reputable brokers will specify crucial details like the barrel’s original contents, char level, and age, so you know exactly what you’re getting. Prices usually range from $75 to $200 for a standard 53-gallon barrel.
Consider Barrel Alternatives
If sourcing an entire bulky whiskey barrel proves difficult, individual staves, barrel heads, and barrel stave boards are fantastic alternatives. Staves are the curved planks that form the barrel sides, and they give you the exact same rustic, charred wood effect without having to deal with the whole barrel.
With some patient hunting, you can find the perfect authentic barrel or barrel wood for your project. That rich patina and whiskey-infused aroma are definitely worth the effort!
Tools and Supplies Needed for Building With Whiskey Barrels
To craft with whiskey barrels, you’ll need some essential tools and supplies. Luckily, most of these are basic woodworking tools you probably already own.
Hardware
The hardware for your stave 3-tier shelf includes:
- 3” wood screws (or barrel bolts)
- Washers, lock washers, and nuts (if using bolts)
- Barrel bolts, which have a rounded head, are great for an authentic rustic look.
Wood Glue
Wood glue is essential, it significantly strengthens the joints between staves. Look for a water-resistant glue that can bond different types of wood. Apply the glue to the joints before screwing or bolting the staves together.
Sandpaper
You must lightly sand the staves to achieve a smooth finish and help the wood glue adhere properly. Use 150-grit sandpaper and always sand with the wood grain. Wipe away dust with a tack cloth.
Stain or Sealant (Optional)
If you want to stain or seal your shelf, pick up a wood stain in your desired hue or a clear wood sealant. Apply 2–3 coats, allowing for drying time between coats. This step helps protect the wood.
Tools
The necessary tools are simple:
- Cordless drill/driver (and a suitable bit)
- Screwdriver or nut driver bit
- Wrench (if using bolts)
- Clamps
- Paintbrush (for glue and stain)
- Tack cloth
With some reclaimed whiskey barrels, wood glue, and basic hardware, you’ll be building a stave 3-tier shelf in no time!
Crafting a Stave 3 Tier Shelf From a Whiskey Barrel
Now that you have your barrel wood, it’s time to get crafting. This is a popular DIY project, perfect for displaying decor or holding plants.
Selecting the Staves
Choose three intact staves from your barrel to use as the vertical supports for the shelves. For a visually balanced shelf, pick staves that are similar in width. Always lightly sand any rough edges.
Cutting the Shelves
For the horizontal shelves, you can use the barrel’s metal hoops or cut circles of wood to size. If using wood, cut three circles of the same diameter, spacing them evenly apart. The shelf diameter will dictate how curved your final shelves are.
Assembly
Stand two staves parallel to each other, about 6 to 8 inches apart. Place a shelf circle across the top, centering it. Glue and nail the shelf in place. Repeat this with the middle and bottom shelves, spacing them evenly. Finally, attach the third stave to the back of the unit to provide crucial support and stability. You now have a rustic three-tier barrel shelf! You can easily customize the look by sanding the wood and applying a sealant or whitewash, or simply leave the natural wood tones for a genuine rustic feel.
Your handcrafted stave shelf makes a great conversation piece and functional decor.
Step-by-Step Instructions for Constructing the Shelf
Gather the Materials
Lay out your barrel staves, wood glue, clamps, sandpaper, polyurethane, and hardware. Make sure you have all the pieces laid out and ready to go before starting construction.
Sand the Staves
Take time to lightly sand down each stave to smooth the surface. It’s actually easier to stain or paint the staves before assembly, so do that now if you plan to add color. Let the staves dry completely.
Attach the Side Supports
Lay two staves parallel to each other, about 10 to 12 inches apart. These will form the vertical side supports for your shelf. Secure the staves together at the top and bottom with wood glue and clamps. Let the glue dry as directed.
Add the Shelves
Place one stave across the side supports to form the first shelf. Secure it in place with wood glue and clamps, aligning the shelf evenly. Repeat for the second and third shelves, spacing them as you like. Let all glue dry completely.
Add Extra Support
Carefully remove the clamps. Use wood glue and sturdy screws or nails to firmly secure the shelves to the side pieces. Always predrill pilot holes to prevent cracking the wood.
Apply a Protective Finish
Your shelf frame is complete! Now, you need a protective topcoat. Apply 2–3 coats of polyurethane, letting each coat dry between applications. This will seal the wood and provide a durable finish. Your whiskey barrel stave shelf is ready!
Finishing and Staining Tips for Whiskey Barrel Furniture
Once your stave shelf is built, it’s time to finish and stain it to truly enhance the rustic beauty of the wood. The barrels’ aging process gives the wood a distinctive patina, so generally, keeping the look natural and distressed works best.
Use a sealant for protection
Apply two to three coats of a sealant, such as tung or linseed oil, to protect the wood while still allowing it to breathe. Wipe on the sealant with a cloth, letting it soak in, and then wipe off any excess. The sealant prevents water damage and stains, and beautifully brings out the wood grain.
Choose an oil-based stain
For color, use an oil-based stain. These products penetrate the wood better than latex stains and perfectly complement the rustic look. Look for stains in “bourbon barrel red” or “whiskey barrel brown.” Apply two coats, wiping away any drips for an even finish.
Distress for character
Once the stain is dry, you can distress the wood for an authentic barrel look. Use steel wool, sandpaper, or wire brushes to rub off stain and create light dents and scratches. The distressing, combined with the natural markings in the wood, gives whiskey barrel furniture a timeless rustic character.
Protect the finish
Finish with two to three coats of satin or matte polyurethane to protect your work. The polyurethane sealant provides a durable finish against spills and water damage. Your stave shelf is now ready to display and enjoy!
Where to Place Your Stave 3 Tier Shelf
Now that your stave 3 tier shelf is assembled, it’s time to find the perfect spot! A focal point in your living room, den, or bar area is ideal.
Living Room
Place the shelf along a bare wall to add visual interest and provide storage for books or decor. The rustic wood tones pair well with leather furnishings and warm paint colors. For a cozy reading nook, position a chair across from the shelf.
Den or Study
The stave shelf makes a handsome addition to a home office. Use it to store reference books, photos, or small sculptures. The tiered design keeps items visible and within easy reach. The shelf helps complete the look of a well-curated, masculine space.
Bar or Kitchen
For an on-trend look, use the stave shelf as a countertop display in your kitchen or dining area. Load it up with sparkling glassware, cocktail books, and bar tools. The natural wood tones pair perfectly with marble or concrete countertops. Your guests will admire your eye for stylish and functional decor.
Wherever you place your whiskey barrel stave shelf, it will bring warmth, texture, and storage to your space.
Other Whiskey Barrel Furniture Ideas
Beyond a stave shelf, there are so many ways to incorporate whiskey barrels into your home decor.
- Barrel table: A barrel table makes a fantastic centerpiece in a kitchen or patio. The curved staves create a unique shape perfect for gathering around.
- Barrel chairs: For cozy seating, barrel chairs can’t be beat. Their rounded shape is ergonomic and embracing.
- Barrel sinks: For a rustic bathroom, a barrel sink is ideal.
- Barrel planters: Whiskey barrels that are no longer watertight can be repurposed as planters. Their sturdy staves will last for years outdoors.
- Barrel lighting: Pendant lights made from whiskey barrels or staves are a great option for ambient lighting.
Let your creativity flow and make barrel furniture a design focal point in your space!
FAQ – Building a Stave 3 Tier Shelf From a Whiskey Barrel
How many staves will I need?
For a typical 3-tier shelf, you’ll want 9–12 staves.
Do I need any special tools?
Only basic tools: a drill/driver, wood glue, clamps, and wood screws. A handsaw will also work for trimming.
How do I prepare the staves?
Sand down any rough edges, then apply a coat of polyurethane or lacquer (optional) and let dry. Wood glue adheres better to a smooth, sealed surface.
How do I attach the shelves together?
Use wood glue on the inside edges of the shelves, then clamp them together, checking that they are level. Secure by driving wood screws through the outside edges.
Do I need a backboard?
Adding a plywood backboard is optional but provides stability and a finished look. Glue and screw it to the back edges of the shelf unit.
Conclusion
And there you have it, your very own custom whiskey barrel shelf to show off your finest bottles and glassware! With a few simple tools, you crafted a statement piece from reclaimed wood that looks like it came right out of a chic urban loft. Not only can you wow guests with your crafty skills, but this shelf is also a conversation starter about your love of fine spirits.
The rich patina of the staves brings warmth and texture to any space. Whether styling it rustic or modern, this handmade shelf infuses character into your home. Cheers to you for taking something ordinary and making it extraordinary through your talents!