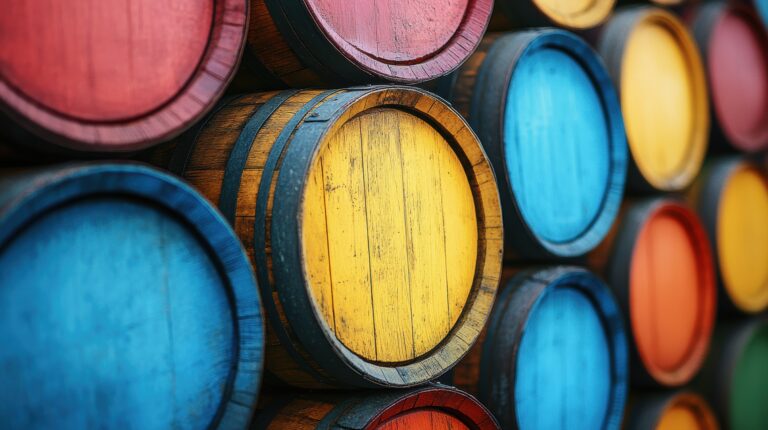
Ever found yourself wondering exactly what secrets are hidden inside an authentic aging whiskey barrel? If you are a true whiskey lover, the idea of cracking into one of those reclaimed oak whiskey barrels is always intriguing. The deep, aromatic wood, the perfectly charred interior, the layers of complex flavor built up over years of spirit aging, it is a feast for the senses even before you pour a dram. If you are comfortable with basic woodworking tools and are not afraid of a little muscle, cutting a barrel in half lengthwise is a seriously fun DIY project that will reveal all those secrets. Follow this guide and you will soon have a bespoke rustic barrel planter or a cool whiskey barrel table, plus a great story to tell every time you grab your favorite bottle of whiskey or classic bourbon. This is definitely not your average weekend chore, but for the curious and ambitious DIYer, it is a rewarding endeavor that is worth the effort. Grab your safety gear, dust off those tools, and let’s get cutting.
Introduction: The Allure of Whiskey Barrels
There’s something irresistible about an old whiskey barrel. Maybe it’s the rich mahogany color or the intoxicating aroma of aged spirits embedded in the wood. Whatever it is, whiskey barrels have a rustic charm that’s hard to beat.
If you’re handy with some basic tools, you can capture that charm by cutting a barrel in half lengthwise to make a pair of simple planters or stands. It’s not too difficult, but there are a few things you’ll want to keep in mind.
First, start with a barrel that’s already empty and clean. You don’t want any leftover whiskey residue or the task will get messy fast! Next, use a jigsaw, circular saw or table saw to carefully cut the barrel in half vertically. Take it slow, following the grain of the wood.
Once cut, you’ll want to sand down any rough edges. Then apply a sealant like polyurethane to protect the wood from weather and prevent rot. For planters, be sure to drill drainage holes in the bottom before filling with potting soil and your favorite blooms.
With some TLC, your DIY whiskey barrel planters or stands will last for years. And every time you look at them, you’ll get a little whiff of that wonderful oak aging aroma. A perfect backyard conversation piece!
Choosing the Right Whiskey Barrel for Cutting
Selecting a whiskey barrel that is suitable for cutting in half lengthwise is a key part of the process. Look for a barrel where the rim and the staves are intact. Skip any barrels with major cracks, holes, or serious damage. This applies to used oak whiskey barrels, vintage barrels, and even wine barrel styles if you are repurposing them.
Size matters
For this cutting project, a medium sized 15 to 30 gallon barrel is usually ideal. Smaller barrels are awkward to work with, and larger barrels require more effort to cut and seal properly.
Wood type
American white oak barrels are the standard for aging wine and whiskey. White oak is dense, naturally watertight, and gives off the best flavors. Try to avoid red oak, pine, or softer woods.
To char or not to char
Charred barrels have a layer of toasted wood inside that imparts those smoky flavors. For a cutting project, a charred barrel is fine, but an uncharred barrel might be slightly easier to handle. In either case, make sure the inside is thoroughly clean before you begin cutting.
Hoop material
Traditional barrels sometimes have wooden hoops, but barrels with steel hoops are far more durable and essential for helping the staves hold their shape once the barrel is cut. Wooden hoops can loosen or break during the cutting process.
With the right barrel, a clear vision, and some patience, you will be on your way to crafting an incredible barrel end table, planter, or other rustic decor that adds warmth to your space. These same steps work for wine barrel furniture and other repurposed wine and whiskey barrels.
Tools and Materials Needed to Cut a Barrel Lengthwise
To successfully cut a genuine whiskey barrel in half lengthwise, gather a few specific tools and supplies.
Safety Equipment
- Safety glasses to protect your eyes from chips and dust.
- Work gloves to protect your hands from the rough wood and metal.
- Dust mask to prevent breathing in wood particles.
Tools
- Electric circular saw (or powerful jigsaw).
- Chisels of various sizes and a claw hammer for initial grooves.
- Sandpaper (start with 80 grit and go up to 220 grit).
- Paintbrush for applying sealant.
Supplies
- Wood glue for any minor repairs or securing loose staves.
- Mineral or tung oil or polyurethane to seal and protect the wood.
With the proper safety gear and tools prepped, you’ll be ready to tackle this serious DIY barrel cutting project. Be sure to work slowly and deliberately, letting your tools do the heavy work. And don’t forget to sand down every single rough edge and apply that protective sealant to ensure your beautiful barrel halves last for many years to come.
Prepping the Barrel Before Cutting
You cannot just start cutting. Before you make that first slice, you need to prepare the barrel. This includes cleaning, inspecting, and stabilizing the barrel so it does not roll while you work.
Cleaning
Give the entire barrel a thorough wipe-down, inside and out, to remove any dirt or debris. Pay extra attention to the rim of the barrel, as this is where you’ll be cutting. Use a shop vacuum to clear out any loose wood chips or sawdust inside the barrel.
Inspecting
Closely examine the barrel for any cracks, small holes, or weak spots, especially right around the middle where your cut will go. Minor imperfections are normal on a used whiskey barrel, but large, noticeable cracks could cause the barrel to fall apart when you cut it. If you find any major structural weaknesses, it’s honestly best to choose a different barrel.
Stabilizing
To stop the barrel from rolling dangerously while you cut, you must secure it firmly. You can wedge the barrel horizontally between two sturdy sawhorses, workbenches, or tables. Make absolutely sure the barrel is level for the most even cut. Having a second person available to help stabilize the barrel during the cut is always a huge help.
Taking the time to properly clean, inspect, and stabilize your whiskey barrel before cutting will make the entire process much safer and help guarantee great results. With some patience and preparation, you’ll be ready for that rewarding first cut!
Step-by-Step Guide to Cutting a Whiskey Barrel in Half Lengthways
To cut a whiskey barrel in half lengthwise, you need a solid plan, the right tools, and good safety equipment.
Gather your hand saw (or circular saw), a chisel, a hammer, strong wood clamps or vise grips to secure the barrel, safety goggles, work gloves, and a dust mask. You also need a solid work surface, like a workbench.
Position the barrel horizontally and secure it tightly in the clamps or vise grips to prevent any rolling. Check that the barrel is perfectly level for that all-important even cut.
Use your chisel and hammer to carefully cut a small guide groove along the top edge of the barrel. This initial groove will help keep your saw straight and ensure an even cut.
Put on your mandatory safety gear, goggles, gloves, and dust mask.
Using your hand saw (or circular saw), start cutting slowly along the guide groove. Apply firm, steady pressure and use long, smooth strokes.
Once the cut is complete, you’ll have two barrel halves, each with a flat, fresh cut edge. Use sandpaper to smooth away any roughness and splinters.
Wipe away all the sawdust with a tack cloth, and you’re done! Your barrel halves are ready for a new life as planters, tables, or rustic décor.
With those essential tools and a bit of patience, cutting a whiskey barrel in half lengthwise is absolutely a DIY project you can conquer. Just remember to take proper safety precautions and go slow. In no time, you’ll have two awesome rustic barrel halves for your home or garden.
Smoothing and Sanding the Cut Barrel Halves
To get that professional finish on your newly cut barrel halves, you’ll need to smooth and sand the edges thoroughly. Grab these essential woodworking supplies:
- Orbital sander with 80, 120, and 220 grit sandpaper.
- A sanding block (for hard-to-reach spots).
- Safety goggles and a dust mask.
Getting started
Attach the 80 grit sandpaper to your sander. Remember, you always start with coarser grits and work your way up to the fine ones. Always wear your safety gear to protect yourself from wood dust.
Turn on your sander and start smoothing the cut edge of one barrel half. Use small circular motions and move slowly across the entire edge. Use a light touch; let the sander do the work. Use a shop vac to clear away the sawdust as you go.
Repeat the exact same process on the cut edge of the other barrel half. Take breaks whenever you feel fatigued.
Finer grits
Switch the sandpaper to 120 grit. Repeat the sanding process on both barrel halves using light, circular motions until the surface feels smooth. Now, move to 220 grit sandpaper and sand again until the edges are very smooth and soft.
Wipe away the final layer of dust with a tack cloth. Your barrel halves should now have clean, rounded cut edges, perfectly ready for finishing and sealing.
With some elbow grease and patience during the sanding and smoothing process, you’ll get amazing results with your DIY whiskey barrel! That time and effort will absolutely be worth the final look.
Stain and Finish Options for Your DIY Barrel Project
Once your whiskey barrel is cut and sanded, you need to decide on the best way to finish and seal the wood. You have a few great options, depending on the look you’re trying to achieve.
Stain
Applying a wood stain is an easy way to deepen the color and give the barrel a more rustic, aged appearance. Stains come in various brown and red hues that highlight the warm tones of the oak. Wipe or brush the stain onto the wood, and then seal it with a clear topcoat like polyurethane.
Paint
For a more custom look, you can paint the half barrels. A coat of primer followed by two coats of outdoor paint (like acrylic latex) gives you endless color possibilities. Make sure to use paint specifically meant for outdoor wood and seal it well to protect it from the weather.
Natural Wood
If you want to keep the beautiful natural wood grain visible, simply sand the edges smooth and apply a natural sealant like tung or linseed oil. You should reapply the oil every year to nourish the wood. This maintains the natural rustic look of the barrel while preventing rot or water damage.
Distressing
Another popular technique is to sand, beat, and distress the wood before staining or painting to create a rugged, timeworn look. Use sandpaper, chains, or chisels to add light scratches and dents to the surface. Then apply your chosen stain, paint, or sealant. The distressing will show through, making your piece look like it has been used for ages.
With the right finish, your DIY whiskey barrel project will become a fun focal point in your garden or home. Take your time testing different options to find the perfect look.
Creative Ways to Use Half a Whiskey Barrel
Once you have your whiskey barrel cut in half, the creative possibilities are truly endless for how to use each half. Here are a few great ideas to get you started:
Planter
Turn one half into a rustic planter for small shrubs, flowers, or succulents. Since the wood will eventually rot, you might want to line it first with landscape fabric before adding soil and plants.
Storage Bin
Use one of the halves as a large storage bin for things like firewood, gardening tools, sports equipment, or even kids’ toys. The shape is excellent for corralling lots of items neatly.
Chair or Table
If you’re handy, you can convert one half into a unique chair, a loveseat, or a side table. Attach legs to the open end, and you’ll have a one-of-a-kind furniture piece perfect for a cabin, patio, or game room.
Pet Bed
Your dog or cat would probably love curling up in their very own whiskey barrel bed. Add a thick cushion, and you’ve created a cozy, rustic pet sanctuary.
Decoration
The easiest use is simply as a decorative item. Place it on its side on your porch, patio, or in your garden. Fill it with potted plants, seasonal decorations like gourds in the fall, or candles. The rustic barrel instantly adds warmth and charm to any outdoor space.
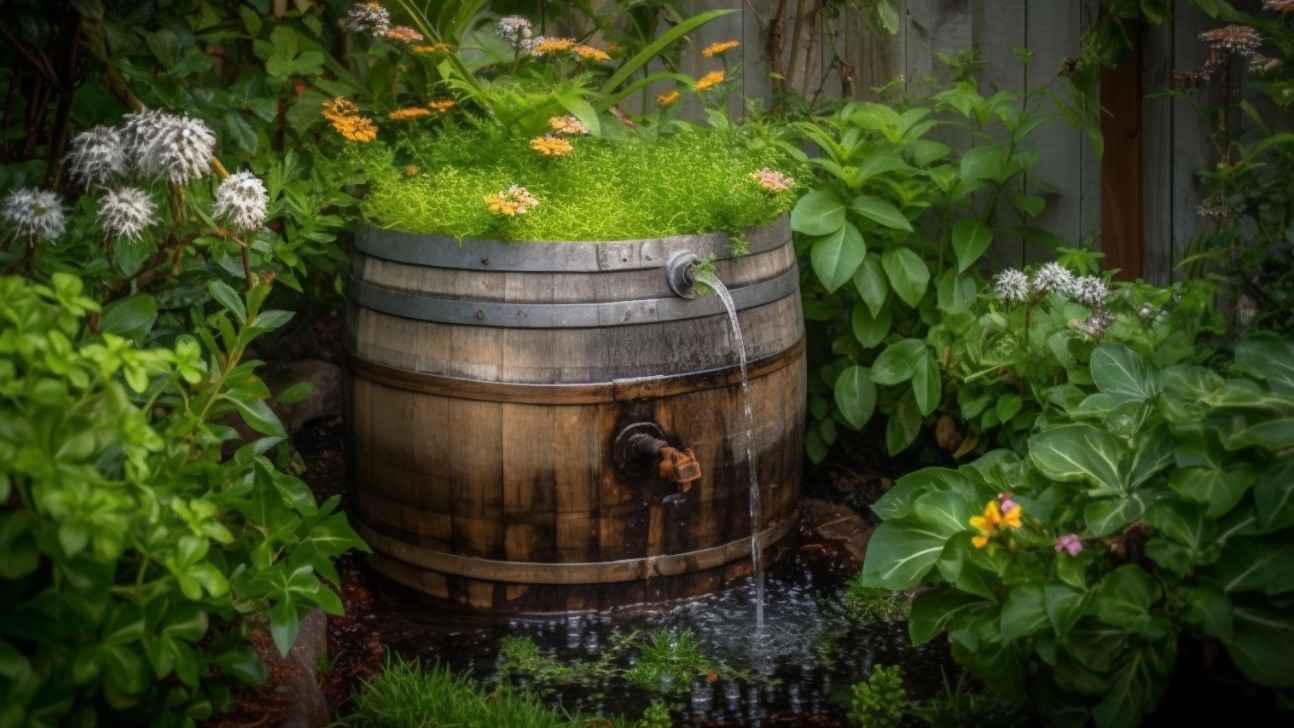
Rain Barrel
For a practical, eco-friendly use, turn one half into a rain barrel. Attach it to a downspout to collect rainwater for washing cars or watering plants. The barrel shape is perfectly suited for this!
FAQ: Common Questions About Cutting Whiskey Barrels Lengthwise
Have you ever wondered about the nuts and bolts of cutting a whiskey barrel in half lengthwise? Many people are curious if this is truly possible as a DIY project. Here are some frequently asked questions and their answers:
Can I cut a whiskey barrel in half lengthwise myself?
Yes, absolutely! With the right tools and safety equipment, cutting a barrel in half lengthwise is definitely doable for even a beginner DIYer. The main rule is to go slowly and carefully.
What tools do I need?
You’ll need basic woodcutting tools like a jigsaw or circular saw, clamps to stabilize the barrel, safety goggles, work gloves, and sandpaper. You’ll also need a metal-cutting blade or a separate tool for getting through those steel barrel bands.
How do I cut the barrel safely?
Clamp the barrel securely to a sturdy work surface. Cut slowly through one stave at a time. Always wear safety goggles, work gloves, and a dust mask. Take breaks often to clear the sawdust.
How do I reseal and finish the cut barrel?
Once cut, you need to sand any rough edges and then reseal the exposed wood with a waterproof sealant like polyurethane. You should also replace the cut steel bands to help the barrel retain its original shape.
What can I use a cut barrel for?
Halved barrels have countless uses: planters, storage, furniture, compost bins, and more. The possibilities for repurposing are endless!
Let me know if you have any other questions about how to successfully cut a whiskey barrel in half lengthwise. With some patience and the right technique, you’ll be enjoying your repurposed barrel in no time!
Final Thoughts
So there you have it, your comprehensive, step-by-step guide for cutting a whiskey barrel in half lengthwise. Now that you’ve mastered this skill, you’ll have an incredible piece of rustic décor for your home or bar that serves as a unique reminder of the care that went into aging that spirit. But even better than the décor, you’ll have learned a new skill and pushed yourself outside your comfort zone. While woodworking projects always carry risks, going slow, wearing proper safety gear, and checking your measurements twice will help guarantee success. The satisfaction of completing this ambitious project and ending up with such a unique item will make all the effort worthwhile