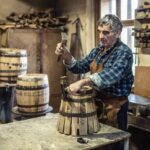
Ever dreamed of making your own aged whiskey right in your own kitchen? You are absolutely not alone! Aging whiskey is a fascinating art form and a really popular hobby for many spirits enthusiasts, whether their favorite pour is Scotch whisky, malt whisky, grain whisky, or classic Kentucky bourbon. The major hurdle, though, is that proper aging traditionally demands expensive oak barrels, long term barrel aging, and a ton of patience. If you don’t have hundreds of dollars to drop on full size American White Oak or other white oak barrels and a place to store them for years on end, you might think you’re out of luck.
Hold on a second. With a few simple tools and smart techniques, you can actually age and flavor whiskey at home without needing an actual barrel. You could be sipping your very own custom aged whiskey in just a matter of weeks. Now, this quick aging method will not perfectly replicate the results of traditional whiskey production process in a distilled spirits plant, with a Master Distiller filling casks at cask strength and watching over them for a decade, but you can still create a wonderfully complex, flavorful distilled alcoholic beverage that is sure to impress your friends.
Introducing Whiskey Aging at Home
The great news is that you can now tackle whiskey aging at home without the need for an expensive, bulky barrel. All you really need is a clean container, your base whiskey, and some oak.
Choosing a Container
Simple glass jars work brilliantly, as do ceramic crocks or stainless steel containers with a reliable airtight seal. Definitely steer clear of plastic. For small, experimental batches, a 1 liter glass jar is perfect. You can always scale up if you plan to age more whiskey, or run several jars at once like a little home style topic listing of flavor experiments for your Home Bar.
Selecting the Whiskey
You want a young, high proof base spirit. Use an unaged spirit like “white dog” whiskey or a very young bourbon. The aging process works best with spirits that are at least 95 proof (47.5 percent ABV), essentially a strong alcoholic mixture based on your chosen grain bill or mash bill. The younger the spirit you start with, the more flavor you can add during your aging process, especially if the original whiskey was distilled from malted grains such as malted barley in a traditional mash tun and pot still or column still.
Adding Oak
This is where the magic happens. Oak cubes, spirals, or oak chips are what provide all the flavor. For a 1 liter jar, try starting with about 10–15 grams of medium toast French or American oak. The toast level is important: lighter toast adds more spice and woodiness, while a heavier toast will bring out richer caramel and vanilla notes often associated with American white oak barrels.
Waiting… and Tasting
Seal that jar up tight and tuck it away in a cool, dark place. Give it a gentle shake every now and then. Start tasting regularly after just a few weeks. When the whiskey hits your sweet spot, your desired level of smoothness and oakiness, it’s time to strain out the wood using cheesecloth or a coffee filter.
Go ahead and bottle your homemade aged whiskey. With this technique, you’ll have a surprisingly sophisticated spirit without the massive wait. Savor your success and enjoy the fruits of your patience, right alongside anything you have from brands like oak & eden or other small producers that play creatively with American white oak barrels.
The Science Behind Whiskey Aging
To successfully age whiskey at home, it helps to know the basic science behind barrel aging and why oak barrels are still standard for everything .
As whiskey rests inside the oak barrels, it continuously interacts with the wood, pulling out compounds that give aged whiskey its distinctive color and flavor. The smaller the container you use with chips or staves, the greater the surface area contact, meaning the whiskey mimics some of that barrel aging much faster.
Oxygen slowly enters the porous wood, sparking chemical reactions that break down the spirit’s harsher compounds into smoother, more complex molecules. This crucial oxidation and evaporation process naturally mellows and concentrates the whiskey’s flavor and can reduce harsher by products found in newly distilled spirits.
The oak wood itself contributes its own wonderful flavors, including vanilla, caramel, and tannins, which add a necessary bitterness and astringency. The type of wood, along with the char or toast level, dramatically impacts the final flavor. More char equals more rich caramelization and intense vanilla flavor, just as in traditional white oak barrels filled at cask strength.
Finally, temperature swings cause the barrel (or even your container) to expand and contract, forcing the whiskey deeper into and out of the wood. This interaction, known as “breathing,” speeds up aging. Storing your whiskey in a spot that experiences slight temperature variations, like a cupboard near a doorway, can help accelerate the aging process. By understanding these factors, you can make informed choices about your raw materials, your oak, and your storage when you adapt big distillery techniques to a small scale home project.
The Importance of Oak Barrels for Aging Whiskey
The oak barrels used in traditional aging are absolutely essential for adding color and, most importantly, flavor to the spirit. As the whiskey interacts with the wood, it extracts several key chemicals that create aged whiskey’s distinctive taste and aroma, whether the spirit started life as malt whisky, grain whisky, or a blended distilled alcoholic beverage.
Vanillin:
This compound is famous for giving oak its characteristic vanilla smell. As whiskey soaks into the wood, it absorbs vanillin and other compounds that impart notes of vanilla, caramel, and butterscotch. The longer the whiskey ages, the more vanillin it extracts, leading to a smoother, sweeter flavor.
Lignin:
This polymer in the wood breaks down over time, giving the whiskey those desirable woody, spicy flavors and its beautiful amber hue. The lignin in oak reacts with oxygen to create the familiar brown color of aged spirits.
Tannins:
Oak barrels contain tannins, which give whiskey a slight bitterness and astringency. These are extracted during the aging process and help balance the sweetness from the vanillin, preventing the aged whiskey from tasting flat or overly sweet.
Oxidation:
Oxidation: Perhaps most importantly, oak barrels allow for controlled oxidation and evaporation. As the whiskey is exposed to tiny amounts of oxygen through the wood, it mellows and becomes smoother. Simultaneously, water and alcohol evaporate (angel’s share), resulting in a higher concentration of all those desirable flavor and aroma compounds.
This is how oak transforms raw distillate from a distilled spirits plant into a complex, flavorful aged whiskey.
Alternatives to Barrel Aging: Glass Jars, Tanks, or Mini Barrels
Glass Jars are a fantastic, simple alternative to full size barrel aging, and they have the added bonus of allowing you to watch your whiskey evolve. Just clean and sterilize some jars, fill them with your spirit, and seal them up tight. Store them in a cool, dark spot for at least 3–6 months if you want deeper results. The whiskey will definitely mellow and start absorbing flavors from the charred oak chips or staves you’ve added.
You have total flexibility to experiment, too:
- Add oak cubes, spirals, or staves for a stronger oak flavor, or mix oak chips with other woods to echo techniques used in oakwood chips based finishing products.
- Toss in spices like cinnamon sticks, vanilla beans, or peppercorns for a truly custom flavor.
- Age the whiskey longer for a more complex, smoother result, similar to scaling up from a simple whiskey recipe to a more involved whiskey production process.
- Blend different jars together later to create your own unique, signature whiskey.
While the color will darken and flavors will develop more slowly than in a small barrel, glass jars give you incredible control. Sample your whiskey regularly to decide exactly when it’s perfect for your palate and for how you want it to taste on your Home Bar shelf.
Using Wood Chips, Staves, or Spirals to Add Oak Flavor
This is the most direct way to get that deep oak flavor into your whiskey without using a barrel. You’re simply adding specially prepared oak wood directly to your container.
Wood Chips
Wood chips are small, irregular pieces of oak that offer a huge amount of surface area. Start with about 10–15 grams of chips per liter of whiskey. Taste frequently and add more if you want a stronger oak flavor. You might need to replace the chips after a month or two as their effectiveness wears off.
Oak Staves
Oak staves are thin planks cut from barrels, offering a deeper oak flavor than chips. Use 1–2 staves per liter of whiskey. Weigh the staves down to keep them fully submerged. Taste regularly and remove them once you hit your desired oakiness. Staves can often be reused multiple times.
Oak Spirals
Oak spirals are thin strips of wood coiled up to maximize surface area. They impart a strong oak flavor very quickly. Use 1 spiral for every 2 liters of whiskey. Remove the spiral as soon as the whiskey reaches your preferred oak level. Spirals can usually be reused a couple of times.
A crucial tip: Boil any oak additions for 10–15 minutes before adding them to your whiskey. This removes harsh tannins. Then, rinse and drain them. Always strain the wood out before bottling your aged whiskey!
Controlling Temperature, Light Exposure and Airflow
If you want to properly age your whiskey at home, controlling the environment is everything.
Temperature:
Keep your whiskey aging in a consistently cool, dark area, ideally between 55 to 65 degrees Fahrenheit. Higher temperatures can cause the whiskey to age too fast, resulting in a harsh flavor. Colder temperatures will drastically slow down the aging process. A basement closet or pantry works well.
Light:
You must avoid exposing your whiskey to direct sunlight or UV light, as this can create off-flavors. Keep your container in a dark place away from windows.
Airflow:
You need a little bit of airflow for the whiskey to “breathe” as it ages, which helps complex aromas develop. Ensure the container’s seal isn’t 100% airtight, a slightly loosened lid or a small hole is needed. But be careful not to let too much oxygen in, or the whiskey will oxidize too much. Check on your aging whiskey regularly!
By monitoring these three factors, you create the ideal environment for your homemade aged whiskey. Take it slow, be patient, and the reward will be a wonderfully mellow, aromatic spirit!
Adding Flavor With Smoking or Toasting the Oak
To give your aging whiskey an extra layer of flavor complexity, you can pre-treat the oak chips or staves by smoking or toasting them before they go into the jar. Heat enhances the oak’s aroma compounds and brings out natural wood oils.
Smoking the Wood
For smoking, you need a smoker, wood chips (like hickory or applewood), and your oak chips/staves. Soak the oak in water, drain it, and then smoke it for 3–4 hours at a low temperature (no higher than 170°F). The longer the smoke, the more intense the flavor. Let the smoked oak dry completely, then add it to your whiskey.
Toasting the Wood
Toasting the oak over an open flame brings out delicious notes of caramel, vanilla, and spice. Use tongs to hold the oak pieces over a gas burner or grill flame for 10–30 seconds until they are lightly charred. Toast both sides, let them cool, and then add them to your aging whiskey. A little bit of toasted oak goes a long way, start with just 1 or 2 pieces.
Adding smoked or toasted oak creates an extra dimension to your aged whiskey. The heat transforms the oak, creating dark caramel and toffee flavors with hints of spice that transfer directly to the spirit.
Blending Young and Old Whiskeys
Blending is an art form that requires a delicate touch to achieve the perfect balance in your final flavor profile.
Adding Young Whiskey:
To introduce vibrant, youthful notes of vanilla and fruit, blend in some younger whiskey (aged, say, 2–5 years). Start by adding just 10–15% of the total volume. Taste as you go, adding the young whiskey in small increments until you reach your desired fruitiness. Be careful not to overpower the older whiskey’s rich oak and spice flavors.
Choosing the Right Old Whiskey:
Select an older whiskey, at least 10–15 years, to provide a solid base with deep oak, caramel, and spice flavors. Charred oak barrel-aged whiskeys work best. Rye and bourbon are common choices, but you can also experiment with single malts.
Balancing the Blend:
The goal is to find the “sweet spot” where the young and aged whiskeys exist in perfect harmony. Start with a tiny batch (around 200 ml). Add the two components in small, controlled increments, tasting constantly. Let the blend rest for a week before your final tasting and adjustments.
The key to blending, like aging, is going slow and being patient. The rewards of crafting a spirit unique to your own tastes make it absolutely worth the effort!
FAQ on Aging Whiskey Without a Barrel
Aging whiskey without a barrel might sound unconventional, but trust me, it works! Here are the answers to some common questions:
What containers can I use?
Glass bottles, ceramic jugs, or stainless steel containers all work well. Avoid plastic!
How long does it take?
Aging time depends on the container and the whiskey style. Expect anywhere from 6 to 24 months for most whiskeys. Taste regularly to decide when the flavor is perfect for you.
Does the container affect flavor?
Yes, slightly. Glass is neutral; stainless steel can add faint metallic notes; and ceramic might introduce earthy flavors.
Do I need to seal the container?
For the best results, yes, you need to seal the container to allow the whiskey to age properly. An airtight seal isn’t critical, but avoid frequent opening, which allows precious alcohol to evaporate.
What about temperature?
Room temperature is generally ideal. Consistency is key, so avoid extreme heat or cold fluctuations.
Does aging without a barrel work for all whiskeys?
It works best for spirits high in congeners, like bourbon, rum, and brandy. Lighter spirits like vodka won’t gain as much flavor.
In summary, while barrel aging is the traditional route, you can successfully age many whiskeys without a barrel. With the right container, time, temperature, and a little patience, you’ll be enjoying your delicious homemade aged whiskey in no time!
Final Thoughts
So there you have it, some easy, effective ways to age whiskey at home without needing a massive, expensive barrel. Now you have the knowledge to experiment with different wood chips, spices, and aging techniques to create totally custom flavors in your own homemade aged whiskey. While the result may not be identical to traditionally barrel-aged whiskey, you’ll still end up with a unique spirit to proudly enjoy and share with friends. And who knows, you might stumble upon your new favorite flavor combination! The possibilities are truly endless.
So, grab your base spirit, round up a few supplies, and start aging your whiskey at home today. Before you know it, you’ll be sipping on your very own bespoke aged spirit. Cheers!
