So you’ve decided to take the plunge into aging your own whiskey. Great choice – there’s nothing quite like sipping a whiskey you’ve crafted yourself. But where do you start? Barrel aging whiskey is an art form, and the quality of your barrel can make or break your final product. Don’t worry, we’ve got you covered. In this post, we’ll walk you through how to cure your own whiskey barrel the easy way so you’ll be sipping your custom-aged whiskey in no time. All you need is a little patience and a few simple tools. Before you know it, you’ll be on your way to becoming a bonafide whiskey connoisseur. Let’s get started!
What Is Barrel Curing and Why Do It?
Barrel curing means aging whiskey in charred oak barrels to impart flavor and color. The whiskey absorbs compounds from the wood that give aged whiskey its distinctive taste and aroma.
Barrel curing whiskey allows complex flavors to develop over time. The whiskey picks up notes of vanilla, caramel, and spice from the wood. As it ages, the whiskey also develops a amber hue.
Aging whiskey in barrels mellows the flavor and reduces the alcoholic burn. Freshly distilled whiskey can taste harsh, but barrel curing helps smooth out rough edges. The aging process allows undesirable compounds to evaporate, leaving behind a more refined spirit.
For whiskey connoisseurs, barrel-aged spirits are highly prized for their depth of flavor and smooth finish. If you have the patience, barrel curing your own whiskey at home can yield a homemade hooch to rival any premium brand. All you need are charred oak barrels, distilled white whiskey, and time.
In a few short years, you’ll have an aged whiskey as unique as your own fingerprints – and much more enjoyable to sip neat or on the rocks! Barrel curing may require patience, but the rewards of a mellow, oak-infused whiskey are well worth the wait.
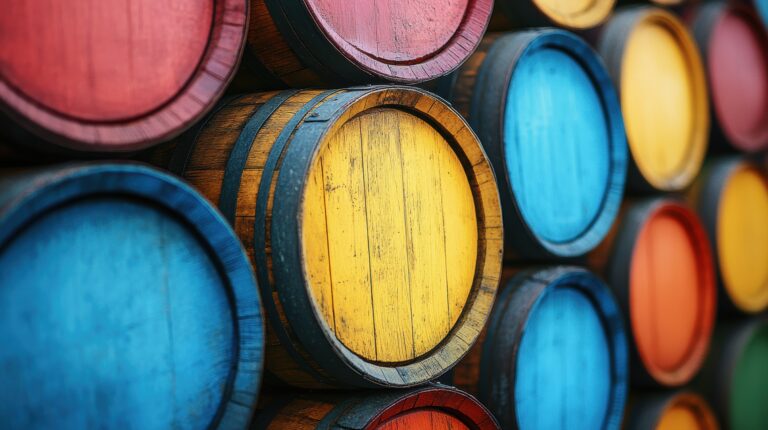
Selecting the Right Barrel for Whiskey
When it comes to curing whiskey, the barrel you choose is crucial. For the best results, go with an oak barrel that previously aged bourbon or sherry. Oak is ideal since it’s porous and allows oxygen in, mellowing the whiskey. Bourbon or sherry barrels also impart subtle flavor notes.
Charred vs. Toasted
A charred barrel, with its darkened, burnt interior, will give your whiskey a smoky flavor. A toasted barrel, gently heated, provides a lighter, mellow finish. For a balanced, mid-range flavor, a medium char is perfect.
Barrel Size Matters
A smaller barrel, like 5 to 30 gallons, means more surface area so faster aging. The whiskey takes on more oak and color in less time. Larger barrels, 50-200 gallons, age whiskey more slowly, resulting in a smoother, mellower flavor. For home-curing on a budget, a 5- to 10-gallon barrel is ideal.
With the right barrel, you’ll be sipping home-cured whiskey in no time. Take your time selecting a barrel and be patient through the aging process. Your patience will be richly rewarded! The results may even turn out better than your favorite brand.
Prepping the Barrel Before First Use
To prepare your whiskey barrel for first use, you’ll need to clean and sanitize it thoroughly.
Cleaning
Scrub the inside of the barrel with hot water and a barrel brush to loosen any debris. Rinse several times with hot water until the water runs clear. Let the barrel air dry completely, at least 2-3 days. This allows the wood to swell and seal any small cracks, preventing leaks.
Once dry, you may notice the barrel has a strong wood odor. To mellow the wood and remove harsh tannins, fill the barrel with a mixture of water and citric acid or tartaric acid (1 pound per 5 gallons of water). Let sit 1-2 weeks, sloshing the solution around occasionally. Rinse thoroughly with multiple hot water rinses until the water is clear and odorless.
Sanitizing
For sanitation, fill the barrel with a sulfur dioxide solution (potassium metabisulfite powder and water) and seal for 24-48 hours. Rinse again with hot water and let air dry completely. Your barrel is now prepped and ready for aging whiskey or other spirits. Following these steps will ensure you have a properly cured barrel to impart the desired wood flavors into your whiskey.
Filling the Barrel With Whiskey
Once your barrel has cured, it’s ready to be filled. You’ll want to source whiskey that hasn’t been aged yet, known as “new make” or “white dog” whiskey. Carefully pour the whiskey into the barrel using a funnel. Fill the barrel about 3/4 full to allow for expansion as it ages.
Seal the barrel by placing the bung (stopper) in the bunghole (opening) and hammering it securely in place. Give the barrel a few sharp blows around its circumference with a mallet to tighten the staves.
Store the barrel in a cool, dark place away from direct sunlight. A garage, shed or basement is ideal. The temperature should remain relatively consistent between 45 to 65 degrees Fahrenheit. Fluctuating temperatures can affect how the whiskey ages and tastes.
Your whiskey will need to mature in the barrel for at least 2 years to be called bourbon. But many distillers age 3 years and longer for more complex flavors. Be patient – good whiskey takes time! Once aged, you can bottle and enjoy your homemade hooch. The longer it ages the smoother and mellower it becomes.
Sip and savor – you’ve earned it after all your hard work curing and filling that barrel! Your homemade whiskey will have rich notes of vanilla, caramel and oak along with the essence of your chosen char. Cheers to a job well done.
Tasting and Checking the Whiskey Over Time
Once the whiskey has aged for at least 3 years, it’s time to sample your creation. Carefully drain a small amount from the barrel into a glass to evaluate. Swirl, sniff and sip – does it have the aroma and flavor you were hoping for? If not quite there yet, reseal the barrel and continue aging.
Checking In
As the whiskey ages, its character will change and develop. It’s a good idea to taste it every 6-12 months to monitor its progress. When it has a complex, balanced flavor with notes of vanilla, spice and oak that you find pleasing, it’s ready to bottle. The aging time can vary from 3 to 10 years or more depending on the type of barrel used and your personal taste.
Patience is key. Don’t bottle too early, or you may end up with a spirit that’s too harsh and undeveloped. On the other hand, aging for too long can result in a whiskey that’s woody and dry. Finding the “sweet spot” is a matter of tasting frequently and bottling once it reaches peak flavor.
Homemade whiskeys may need to be filtered before bottling. As the whiskey interacts with the wood over time, some sediment can build up. Run it through a funnel with cheesecloth or a coffee filter to remove any particles before filling your bottles.
When your whiskey has aged to perfection, it’s time to share your handcrafted spirit with friends or enter it into competitions. Savor the fruits of your patience and labor – you’ve earned it!
Deciding When the Whiskey Is Ready
Once the barrel has been filled and sealed, the waiting game begins. There’s no exact science to know when your whiskey will be ready to bottle, but here are some signs it’s nearing maturity:
Taste Testing
After about 6-12 months, you’ll want to start sampling your whiskey to monitor how the flavor develops. As it ages, notes of caramel, vanilla, and oak will emerge. The whiskey will mellow and smooth out. When flavors have blended nicely and harsh, boozy notes have faded, it’s getting close. But patience, my friend.
Color Change
Originally clear, the whiskey will take on a golden amber hue over time from the oak barrel. The longer it ages, the darker it becomes. An aged whiskey will be a deep copper or mahogany brown.
Oak Flavor
At first, oak flavors will be very pronounced. But as months pass, the oakiness will mellow and integrate with the other aromas and tastes. Once the oak is subtle and balanced, your whiskey is nearing readiness.
Blending the Barrels
For the best flavor, you may want to blend whiskey from separate barrels before bottling. Sample and mix a small amount from each barrel to achieve the perfect blend of aromas and tastes. Let it sit for a week or two, then taste again before bottling.
A well-aged whiskey can take 1-5 years or more to fully develop in the barrel. But with regular sampling, you’ll know when your whiskey has achieved a balance of flavors and aromas that pleases your palate. That’s when you’ll know it’s time to bottle and enjoy the fruits of your labor!
Bottling and Enjoying Your Barrel Aged Whiskey
Once your whiskey has aged to your liking, it’s time to bottle and enjoy the fruits of your labor. You’ll want to have bottles, corks or cappers, and labels ready.
Bottling
Carefully siphon or pour the whiskey from the barrel into sterilized bottles. For best quality, use glass bottles specifically meant for bottling spirits. Cork or cap the bottles and seal well to avoid oxidation.
Label your bottles with the type of whiskey, barrel details like char level and wood type, and bottling date so you know exactly what’s inside and can compare different batches.
Tasting
Now comes the fun part—tasting your creation! Let the whiskey breathe in an open bottle for 15 to 30 minutes before pouring your first dram. Swirl, sniff, and sip. Note the aromas of vanilla, caramel or oak and how the flavors develop on your palate.
Compare subsequent batches to see how your whiskey is evolving. Barrel aging mellows and transforms the spirit over time. Share with friends and get their impressions. Aged whiskey also makes a memorable gift for any whiskey lover or homebrewing enthusiast.
With care and patience, you’ve crafted a whiskey to be proud of. Homemade, handcrafted, and full of memories, your barrel-aged whiskey is meant to be enjoyed and celebrated. Cheers!
Maintaining the Barrel Between Uses
To keep your whiskey barrel in good shape between uses, there are a few easy maintenance tips to follow:
Cleaning
- Rinse the barrel with water to remove any debris. Let it air dry completely.
- For stuck-on residue, make a paste from water and baking soda. Apply with a scrub brush and rinse well.
Storage
- Store the barrel in a cool, dry area away from extreme heat or cold. A garage or shed is ideal.
- Place the barrel on its side with the bunghole facing down. This allows air flow and prevents the buildup of mold or musty smells inside the barrel.
- If storing for long periods, consider a barrel stand or rack to keep the barrel off the ground.
Conditioning
- Before reusing the barrel, re-hydrate the wood with a few gallons of water. Let it soak in, then drain completely.
- For barrels used to age spirits with strong flavors like whiskey, a few rinses with a neutral spirit like vodka or white rum can help remove any lingering traces and prevent flavor carryover. Discard the spirit after rinsing.
- Once conditioned, the barrel is ready for your next batch. With proper care and maintenance, a whiskey barrel can last for several years of use.
Following these simple steps will ensure your barrel stays fresh and flavorful, allowing you to produce batch after batch of smooth, mellowed spirits. A little maintenance goes a long way for a DIY distiller!
Troubleshooting Common Barrel Curing Issues
If your barrel isn’t curing properly, don’t panic. Some common issues are easy to fix.
Did you clean the barrel thoroughly before filling it? Any residue can prevent proper curing. Dump the whiskey and start over with a clean barrel.
Is the barrel swollen or leaking? The staves may have dried out. Submerge the barrel in water until the wood absorbs enough to seal the leaks. Drain and refill with whiskey.
Does the whiskey taste off? The barrel may have been exposed to contaminants. Clean the barrel again and sample the whiskey daily until the taste improves. If it doesn’t, you’ll need to start over with a new barrel.
Is the whiskey not aging quickly enough? The barrel may be too large for the amount of whiskey. Less surface area means slower aging. Consider bottling some whiskey to increase the barrel’s ratio of surface area to volume.
Don’t lose hope if issues arise. With some troubleshooting, your barrel can still produce a great aged whiskey. Stay on top of the curing process, be patient, and make adjustments as needed. Your efforts will be rewarded!
Final Thoughts
That’s it, just a few simple steps to cure your own whiskey barrel at home the easy way. Now you’ve got a barrel ready to age your favorite spirit and create a custom blend like a pro. All that’s left to do is source some quality grains, mash them up, distill the results, and fill your barrel. OK maybe there are a few more steps, but you’ve tackled the hardest part. Once you’ve got a barrel of aging whiskey, you’ll be the envy of all your friends. Now get out there and start experimenting – you’ve got a lot of tasting and perfecting to do!